
The Support Hub Site Builder
A guide for the people who run a Support Hub site: how to build pages from widgets, publish documents from Google Docs, and manage the site from the Admin area. The screenshots come from an example site; yours will have your own logo, colours and content.
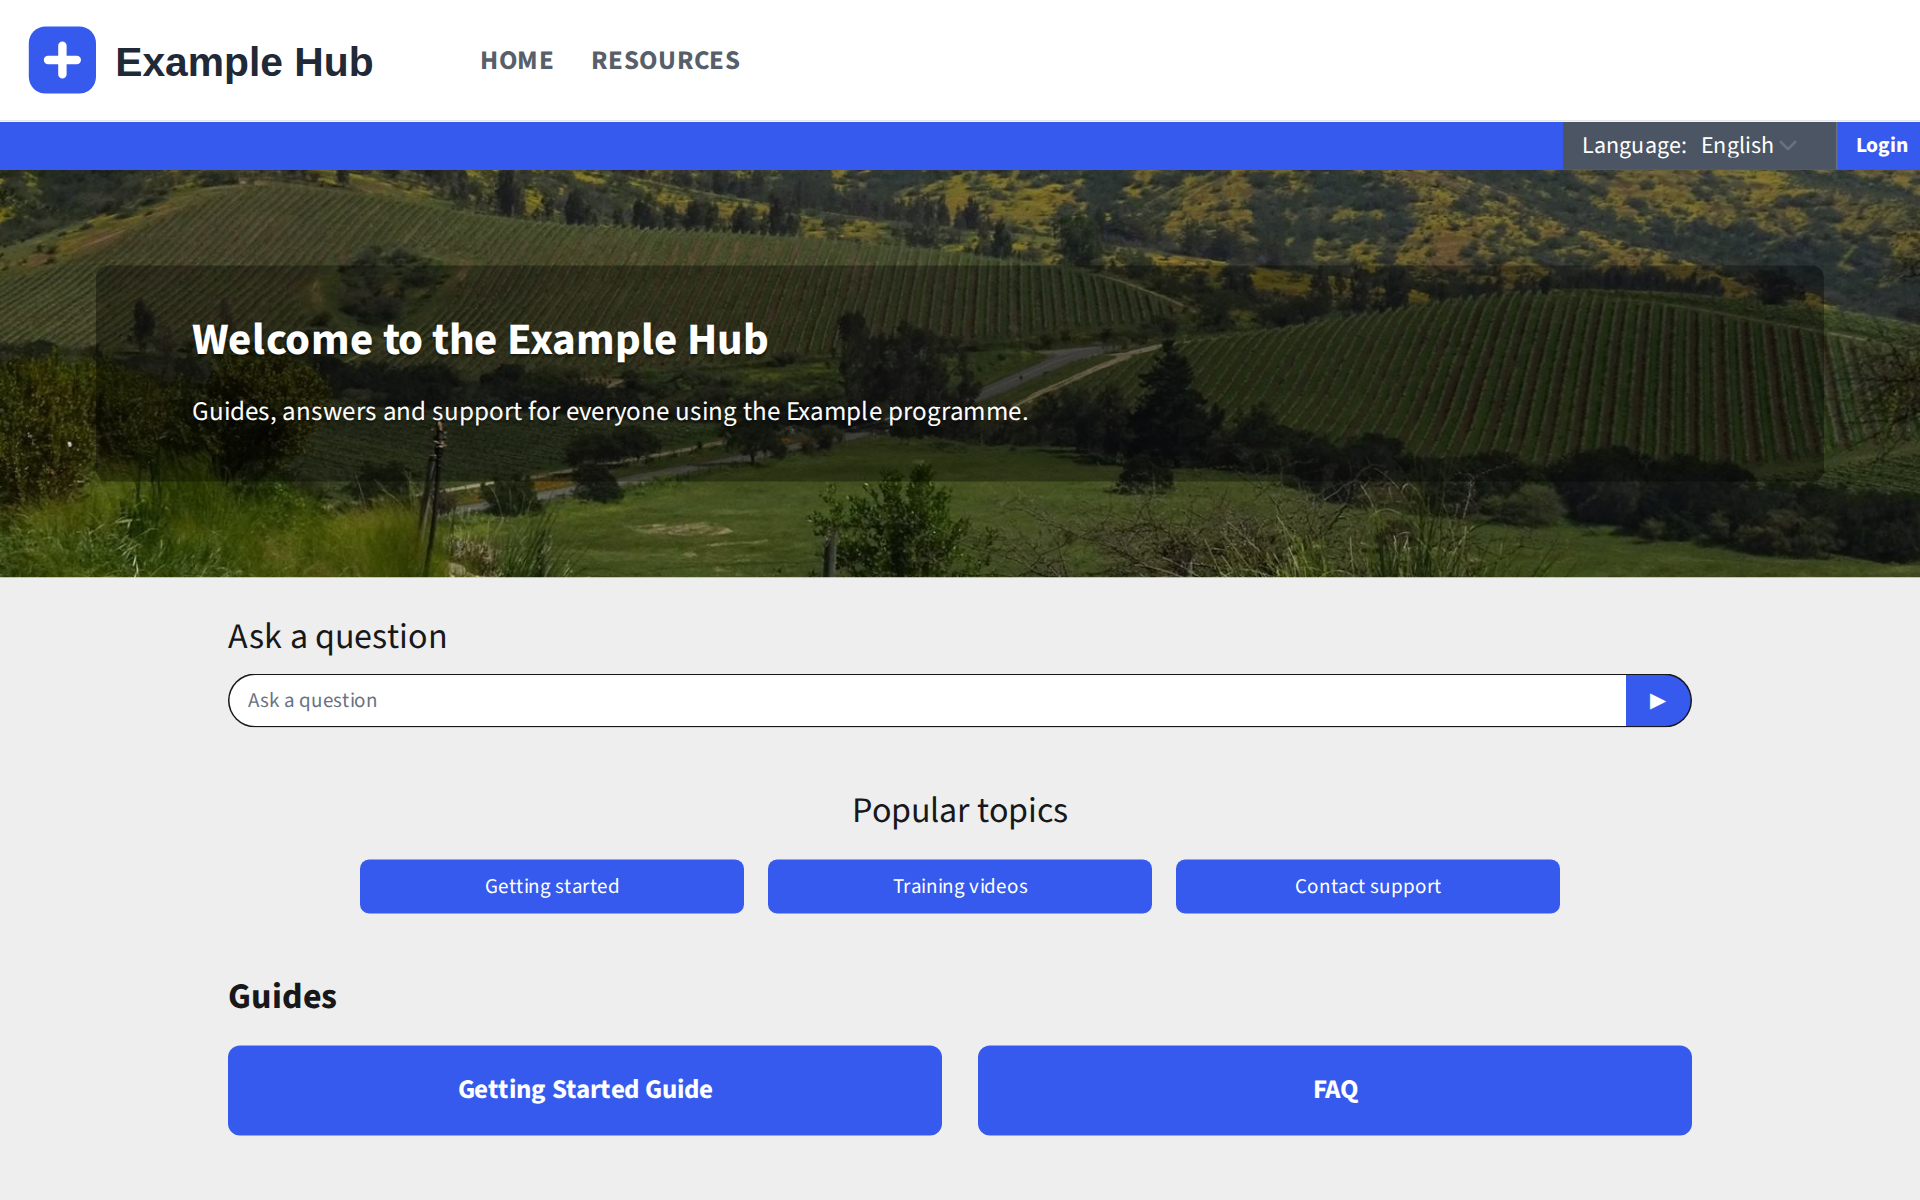
Quick start
- Sign in. Select Login at the top right of your site.
- Edit the page. Select Edit widgets on the blue bar. Each widget gets a toolbar, and a + button appears between widgets.
- Add a widget. Select + where you want it, then choose a widget.
- Configure it. Select ✎ on the widget, fill in the panel, then select Apply.
- Save. Select Save page on the blue bar. Nothing is published until you do.
Site-wide settings (logo, colours, languages, users) are under Admin, on the right of the blue bar.
Signing in
Select Login at the top right and sign in with your organisation account. Once you're signed in, the blue bar shows Edit widgets on the left, and your account, Admin and Logout on the right.

If your site hides the login link (see Access), go to /admin/login on your site instead, for example https://your-site.supporthub.global/admin/login.
You only see Edit widgets and Admin if you're an admin of the site. Viewers can sign in, but can't change anything. To become an admin, ask an existing admin for an invite (see Invites).
Editing a page
Select Edit widgets on the page you want to change. The page switches to edit mode:
- a + button appears above and below every widget, for adding a new one at that point;
- each widget gets a toolbar: ↑ and ↓ move it, ✎ opens its settings, and the bin deletes it;
- the blue bar shows Save page and Cancel.
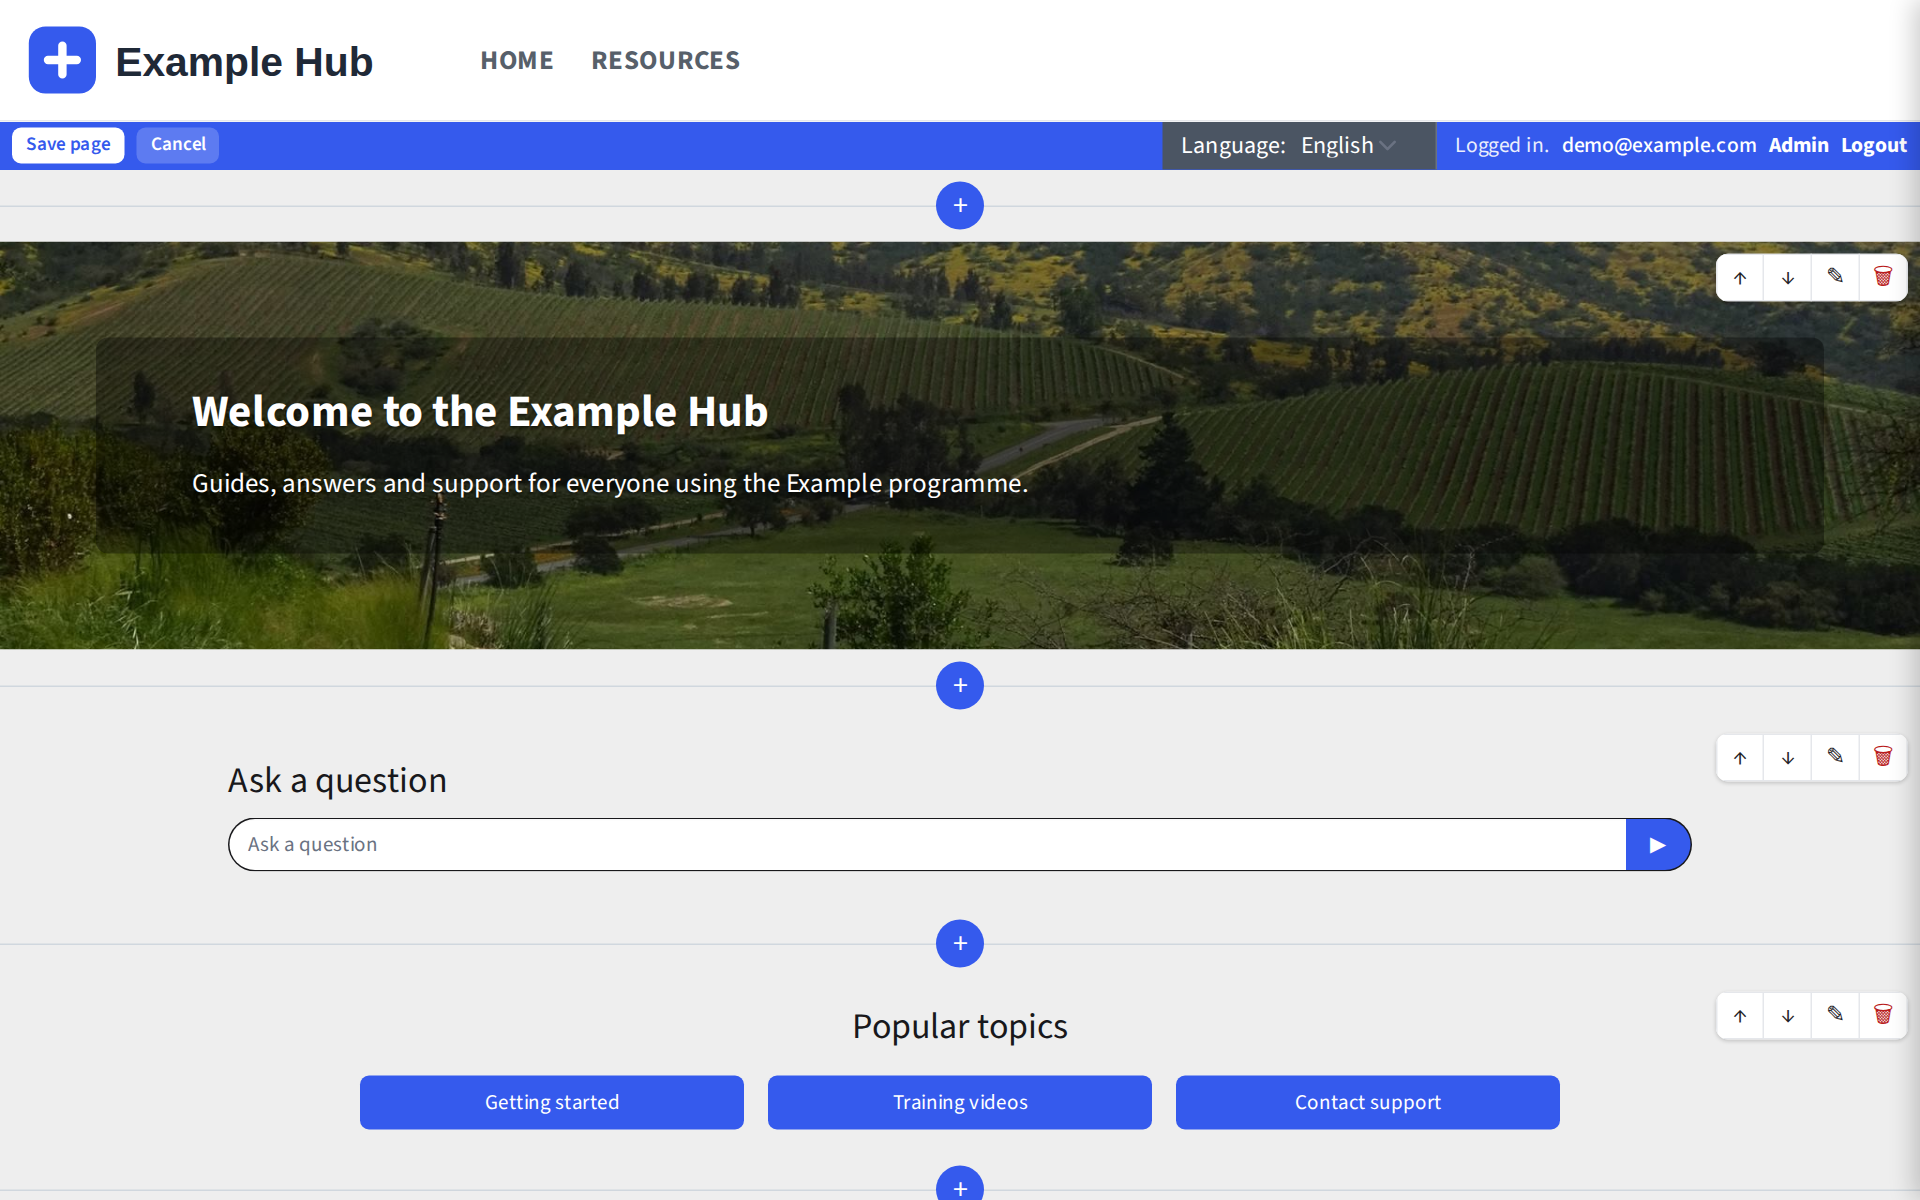
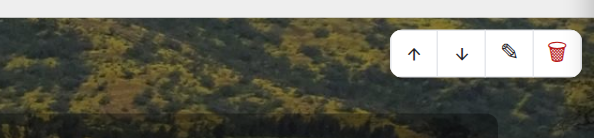
Widgets stack vertically down the page, in the order you set with ↑ and ↓.
Adding a widget
Select + where the widget should go. The picker lists every widget your site can use, grouped by purpose: Content, Community, Support, Documentation, Layout and Advanced.
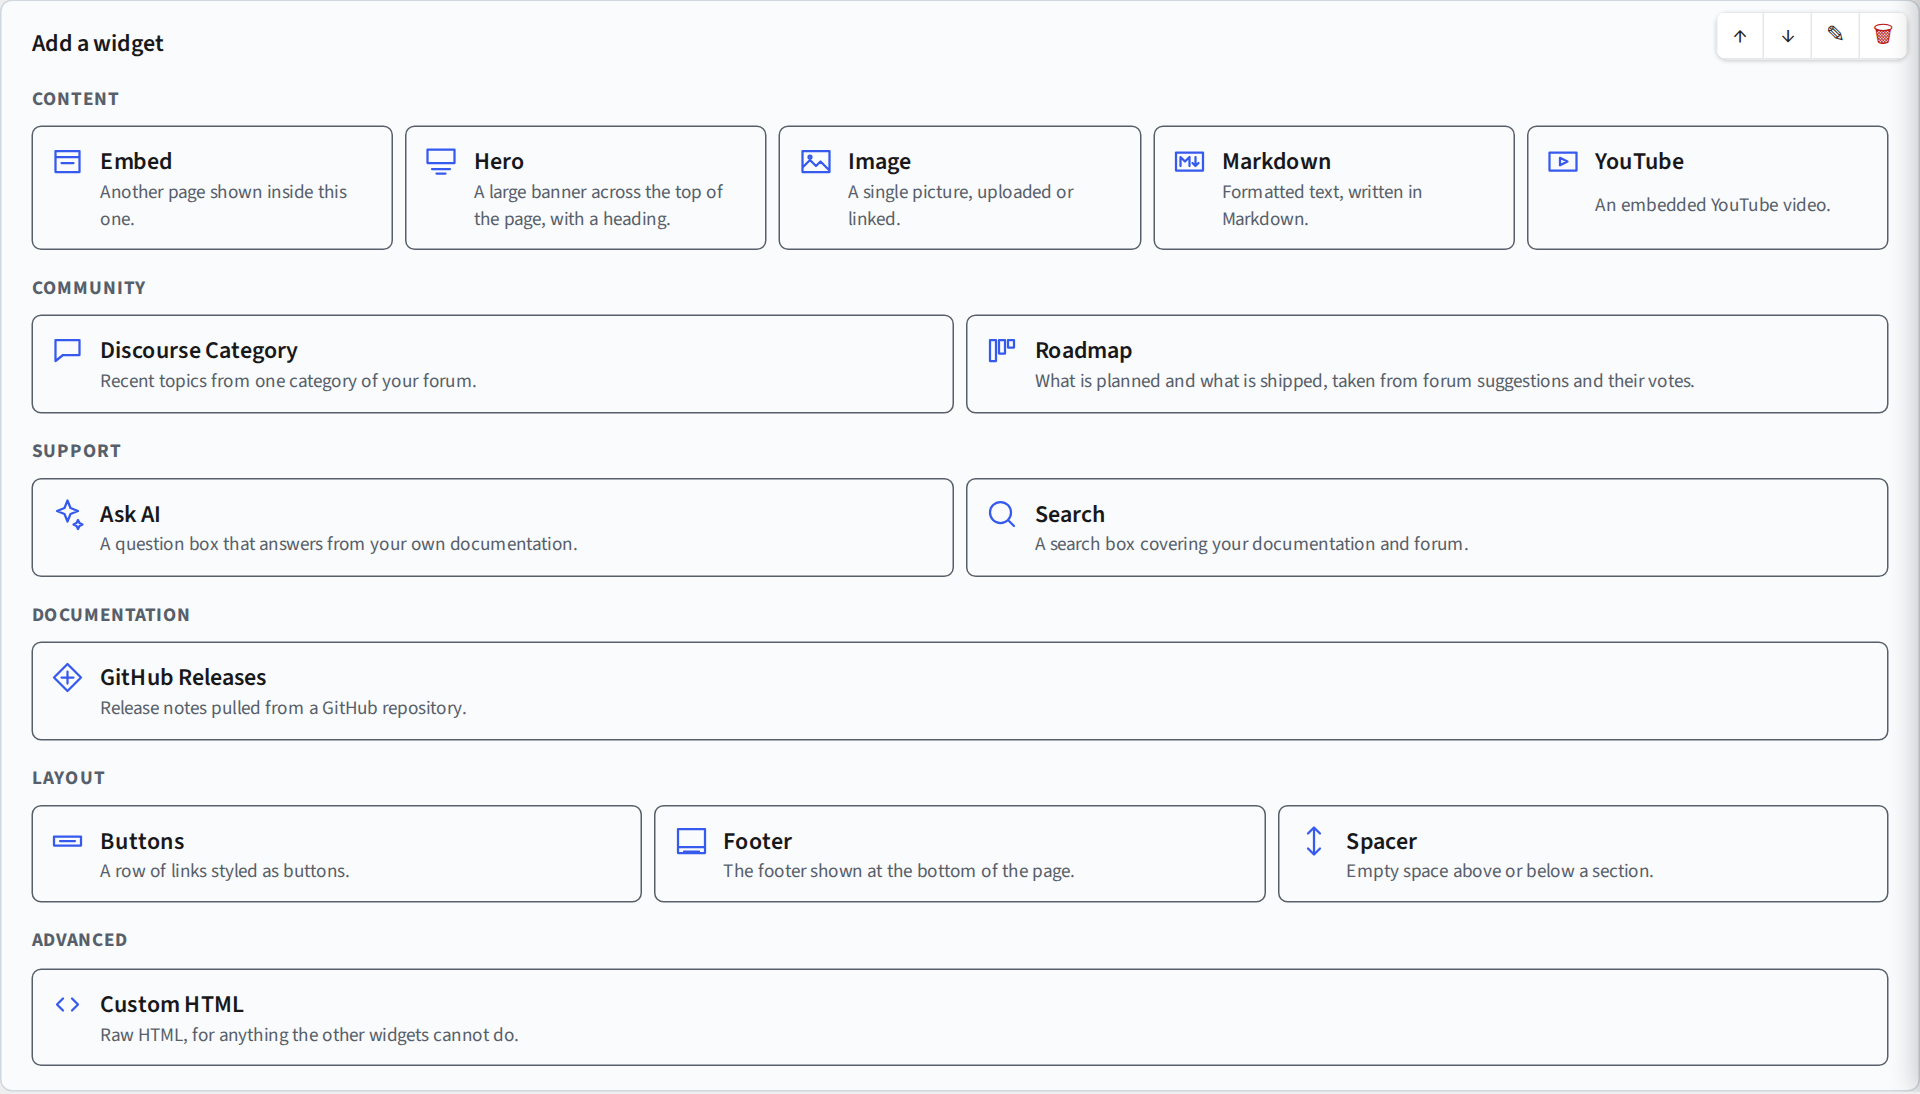
Some widgets only appear once their service is connected under Admin → Integrations: Docs Category needs Google Workspace, Heyform needs HeyForm, and the forum widgets need Discourse.
Configuring a widget
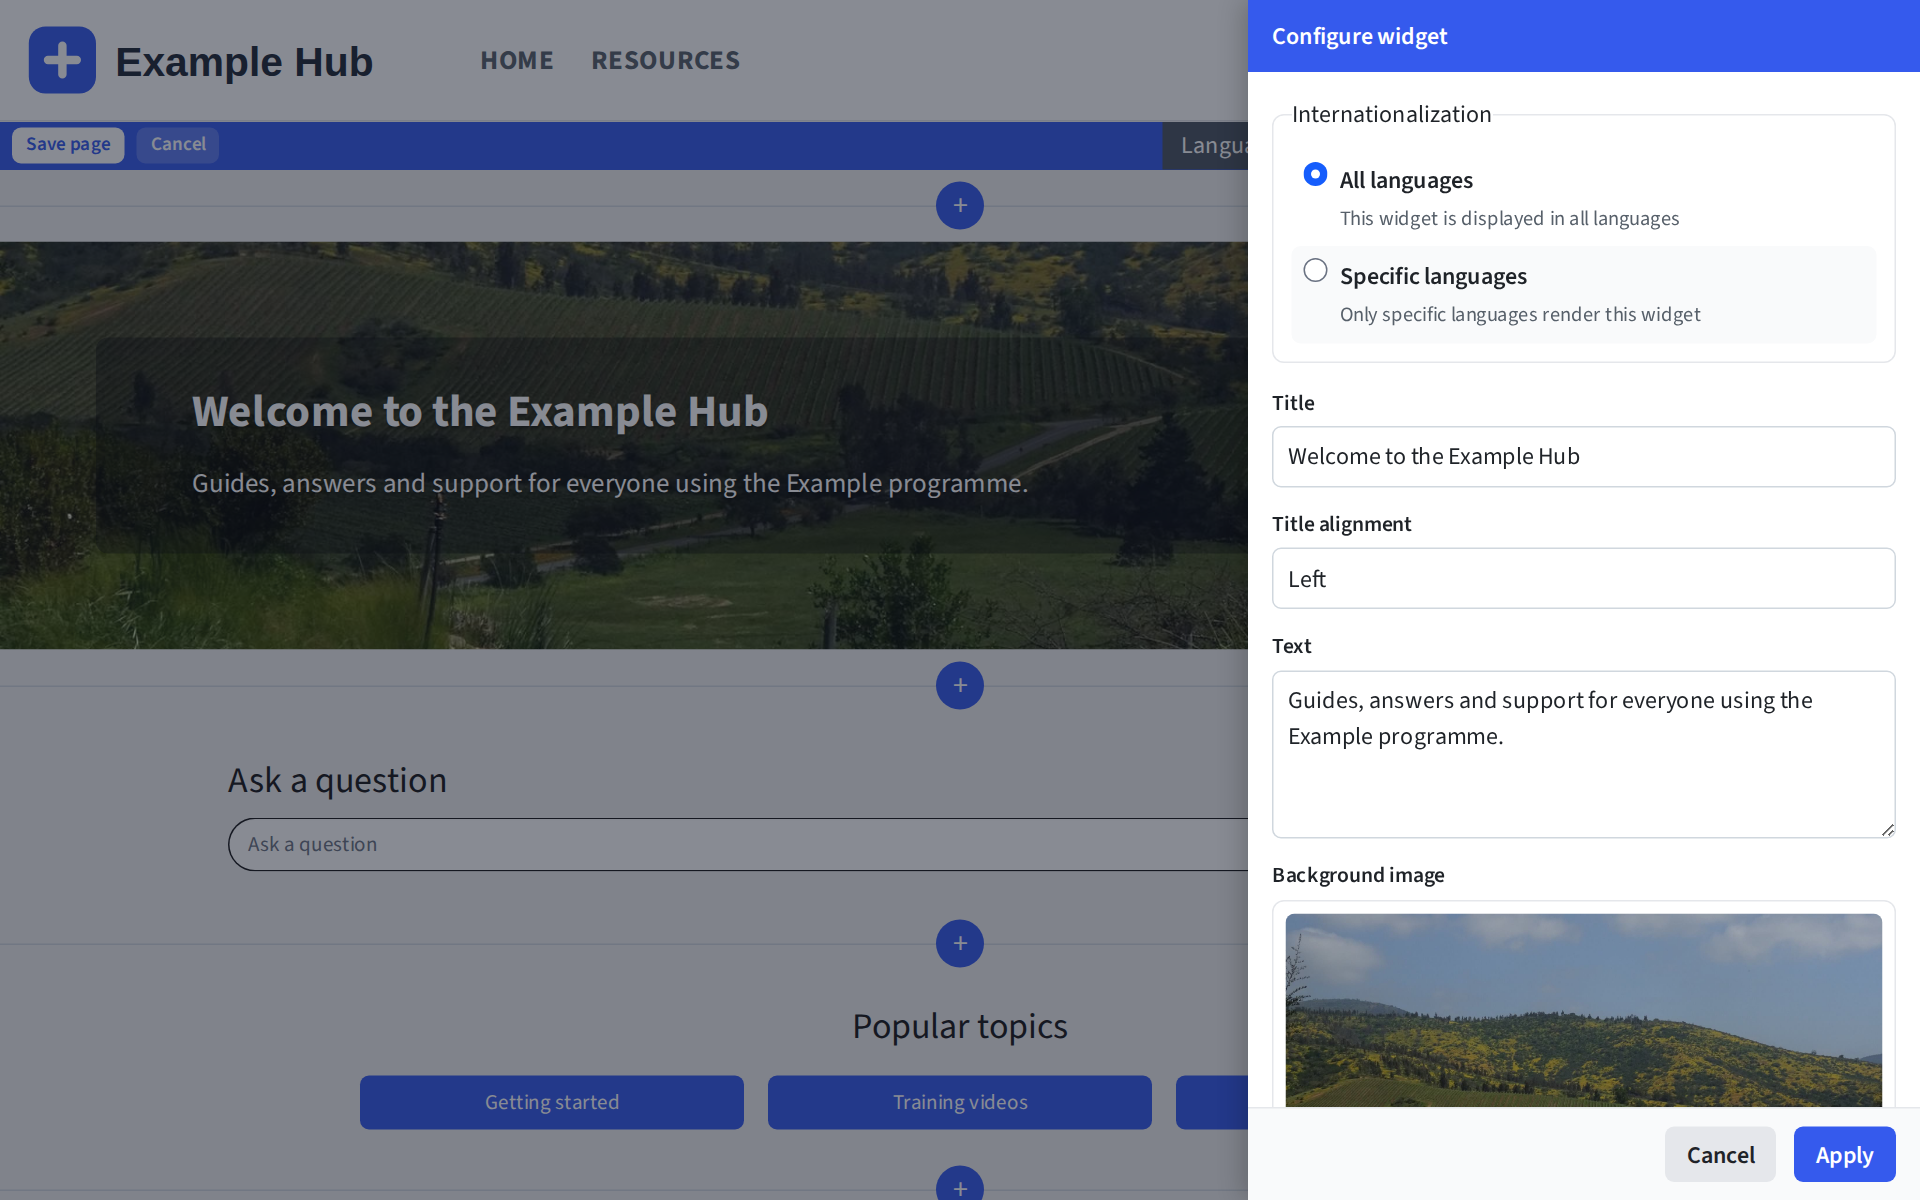
Select ✎ on a widget to open its settings panel on the right. Every panel starts with Internationalization:
- All languages shows the widget whatever language the visitor picks;
- Specific languages shows it only for the languages you tick. Use this to give each language its own version of a widget, for example a French hero for French visitors.
Below that are the widget's own settings (see Widgets, below). Select Apply to put your changes on the page, or Cancel to drop them.
Saving
Apply only changes the page in front of you. The blue bar counts what you haven't saved yet, for example "1 change not saved yet". Select Save page to publish your changes, or Cancel to throw them all away. If you try to leave with unsaved changes, the browser warns you first.
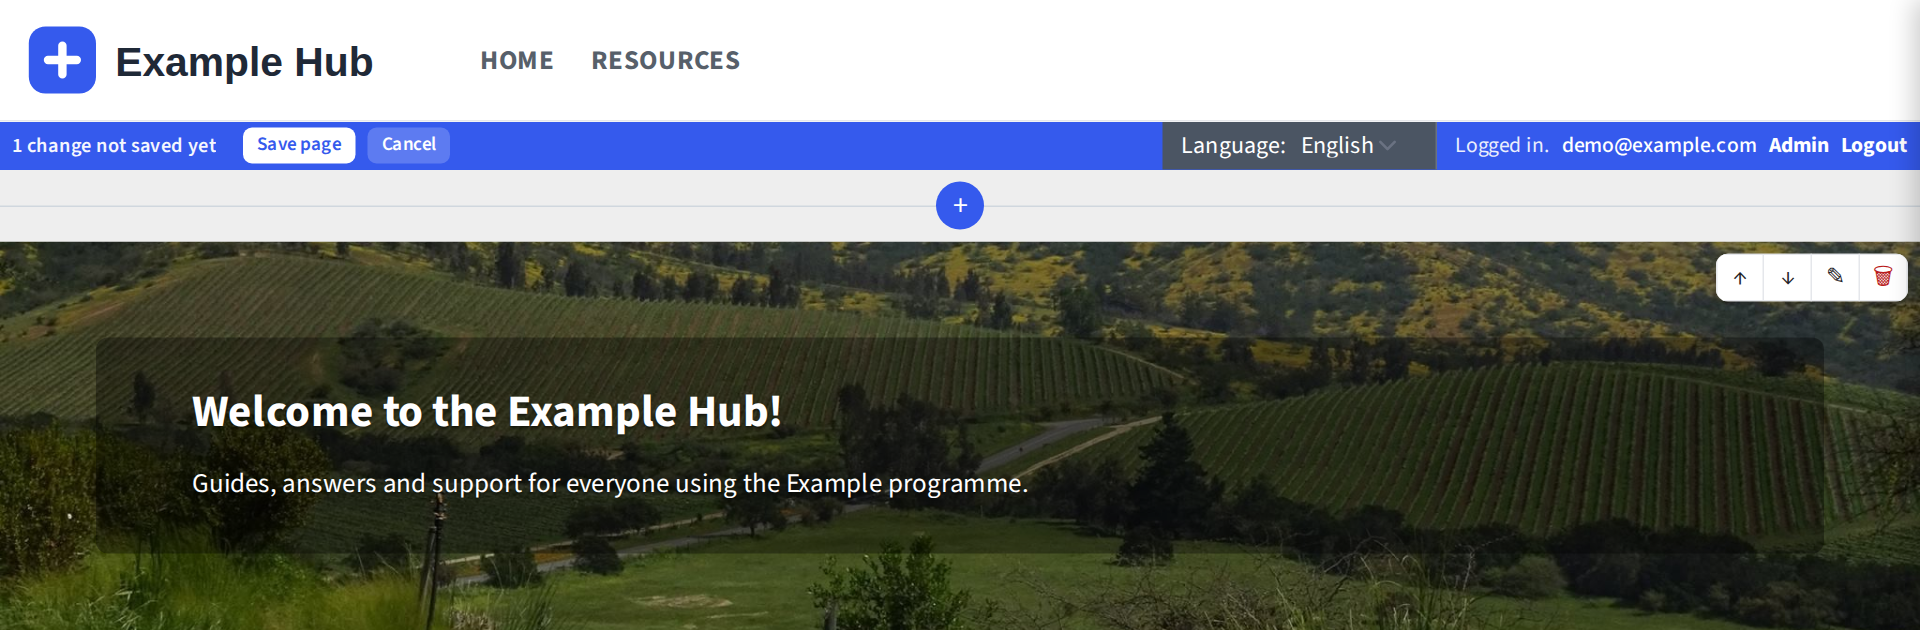
After saving, open the page in a private window to see it as a visitor does.
Pages and the menu
Every page appears in the site's top menu, in the order listed under Admin → Pages.
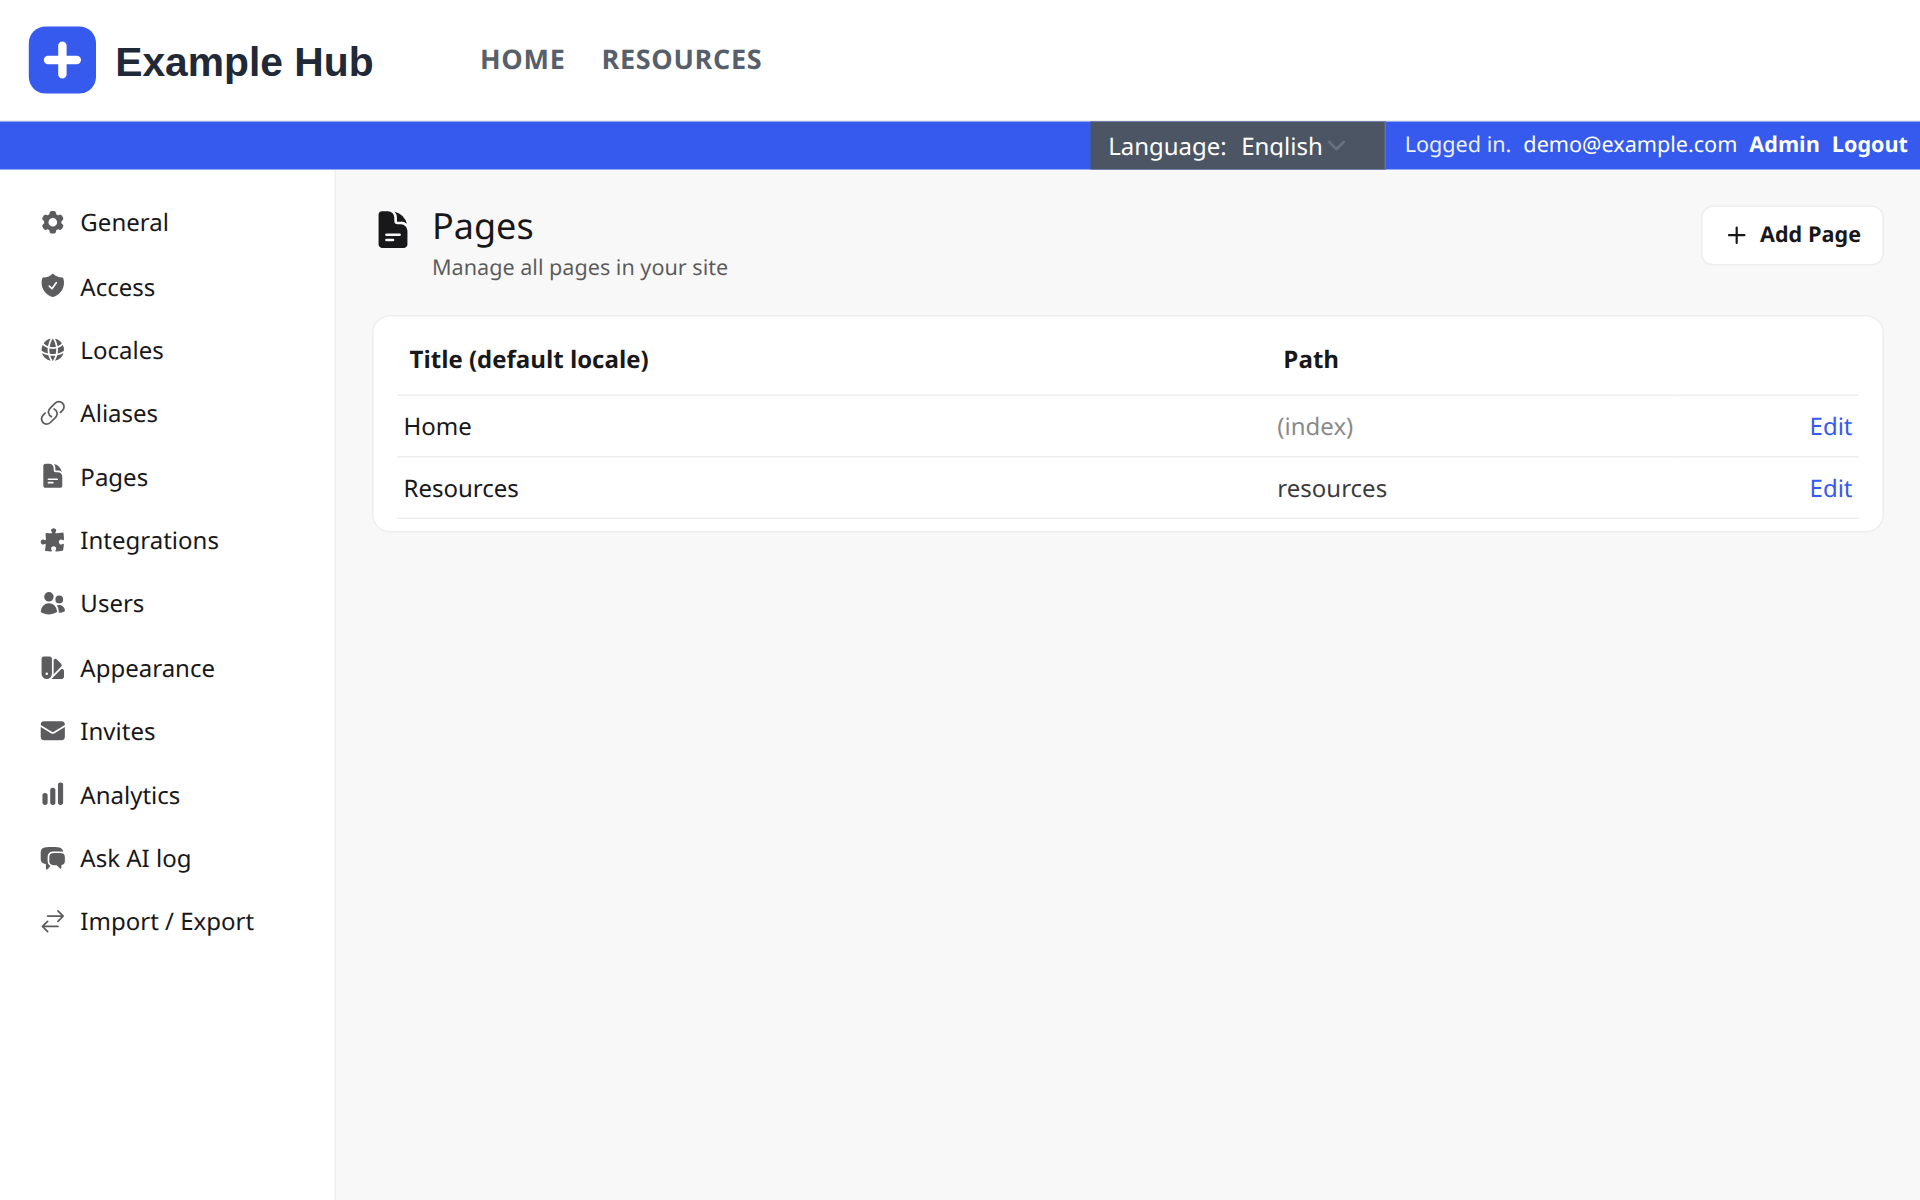
- Add Page creates a page. Give it a title (shown in the menu) and a path (its address: "faq" becomes /faq). Leave the path empty for the home page.
- Edit changes the title and path, and lets you give the title a translation for each language your site has.
- Members only restricts a page to signed-in members of the site. It's also hidden from the menu for everyone else.
- Drag the rows to change the menu order. Delete removes the page and everything on it.
To add widgets to a new page, open it on the site and select Edit widgets.
Widgets
The widgets are listed below by group, as they appear in the picker. The most-used ones are shown with how they look on the page and their settings panel.
Hero
A large banner across the top of the page, with a heading, a line of text and a background image (or a video).

Settings: title, title alignment, text, background image (upload one), and optionally a video URL in place of the image.
Ask AI
A question box that answers in plain language from your own documents, and lists the documents it used as sources. If the documents don't cover the question, it says so rather than guessing.

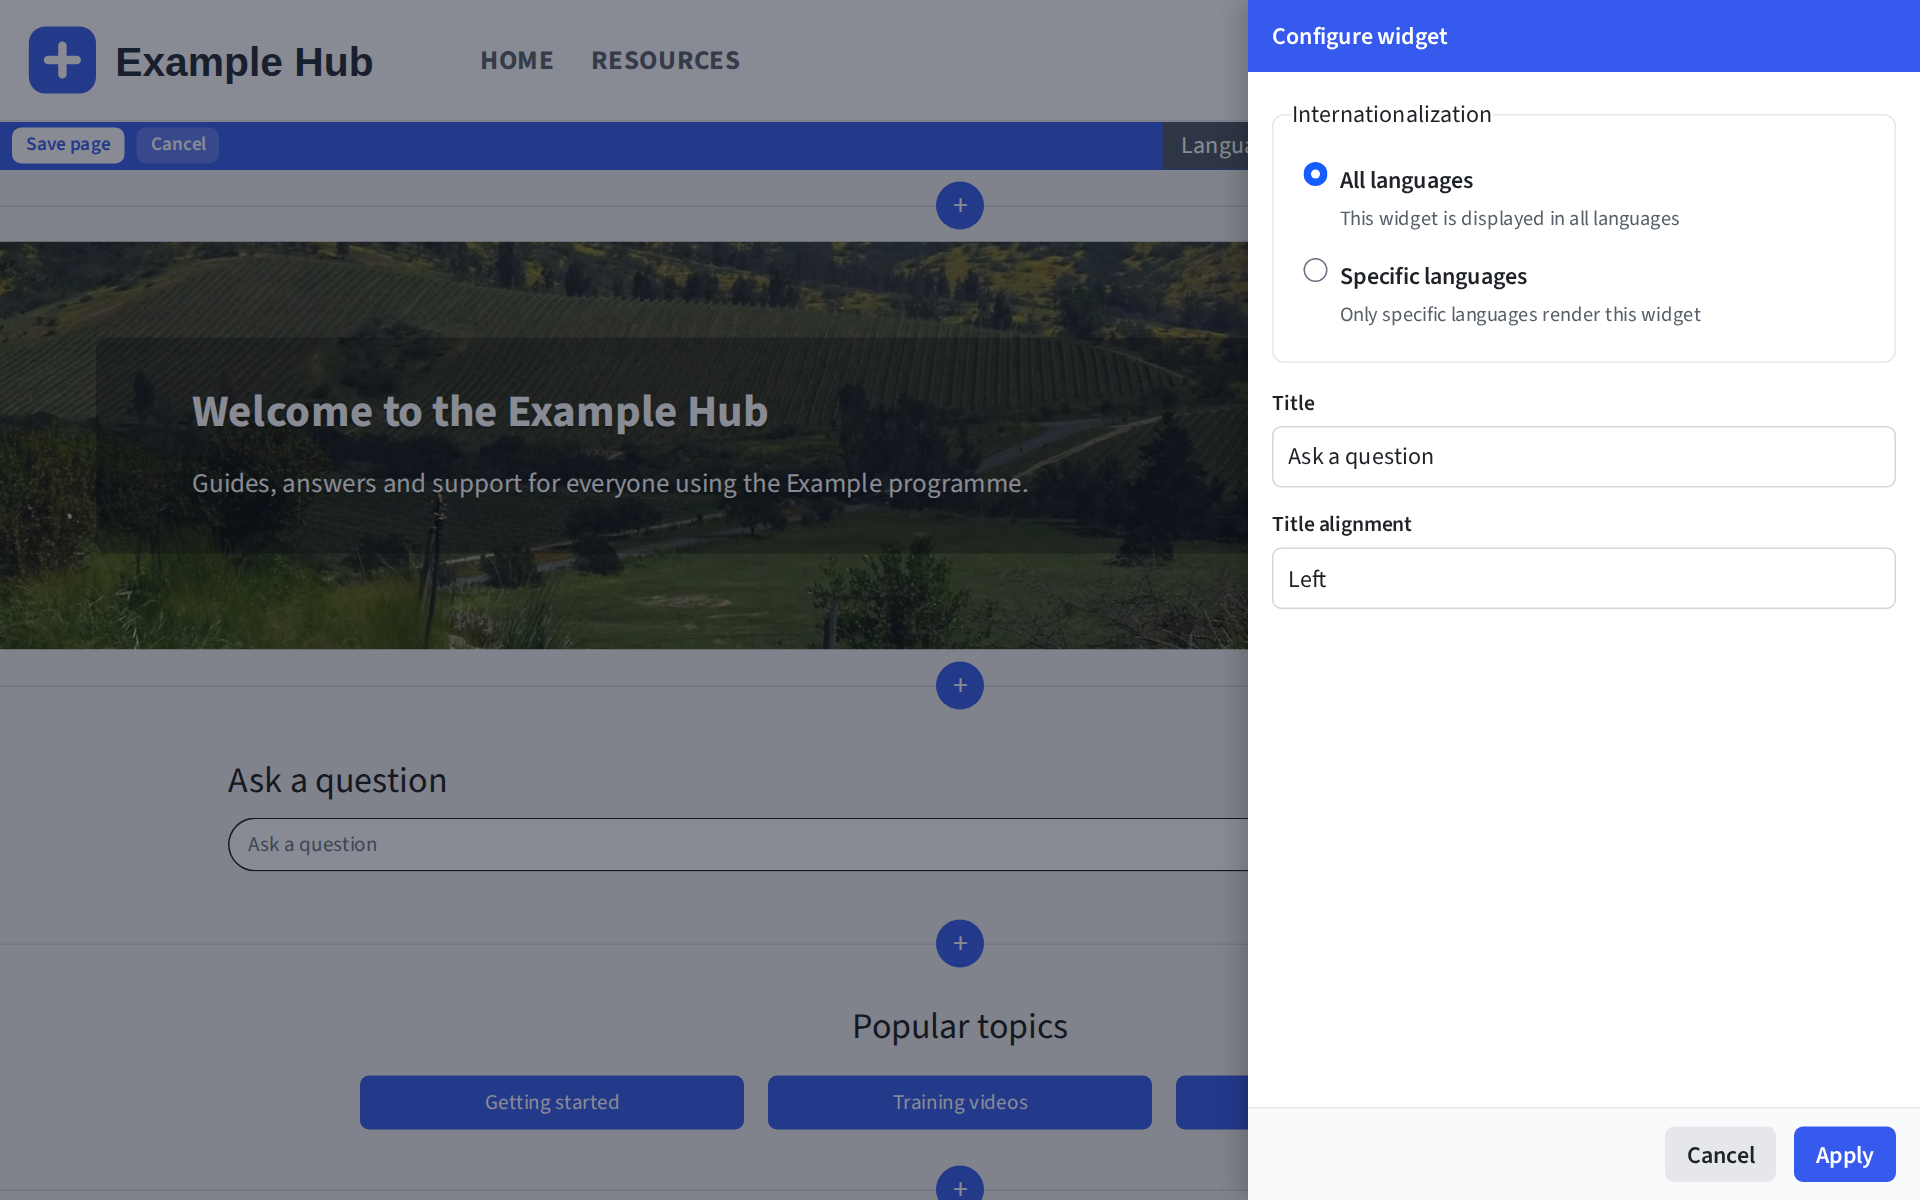
Settings: title and title alignment. Ask AI only knows what's in your Docs Category documents, so the better your documents, the better its answers. Every question and answer is recorded in Admin → Ask AI log (see below).
Search
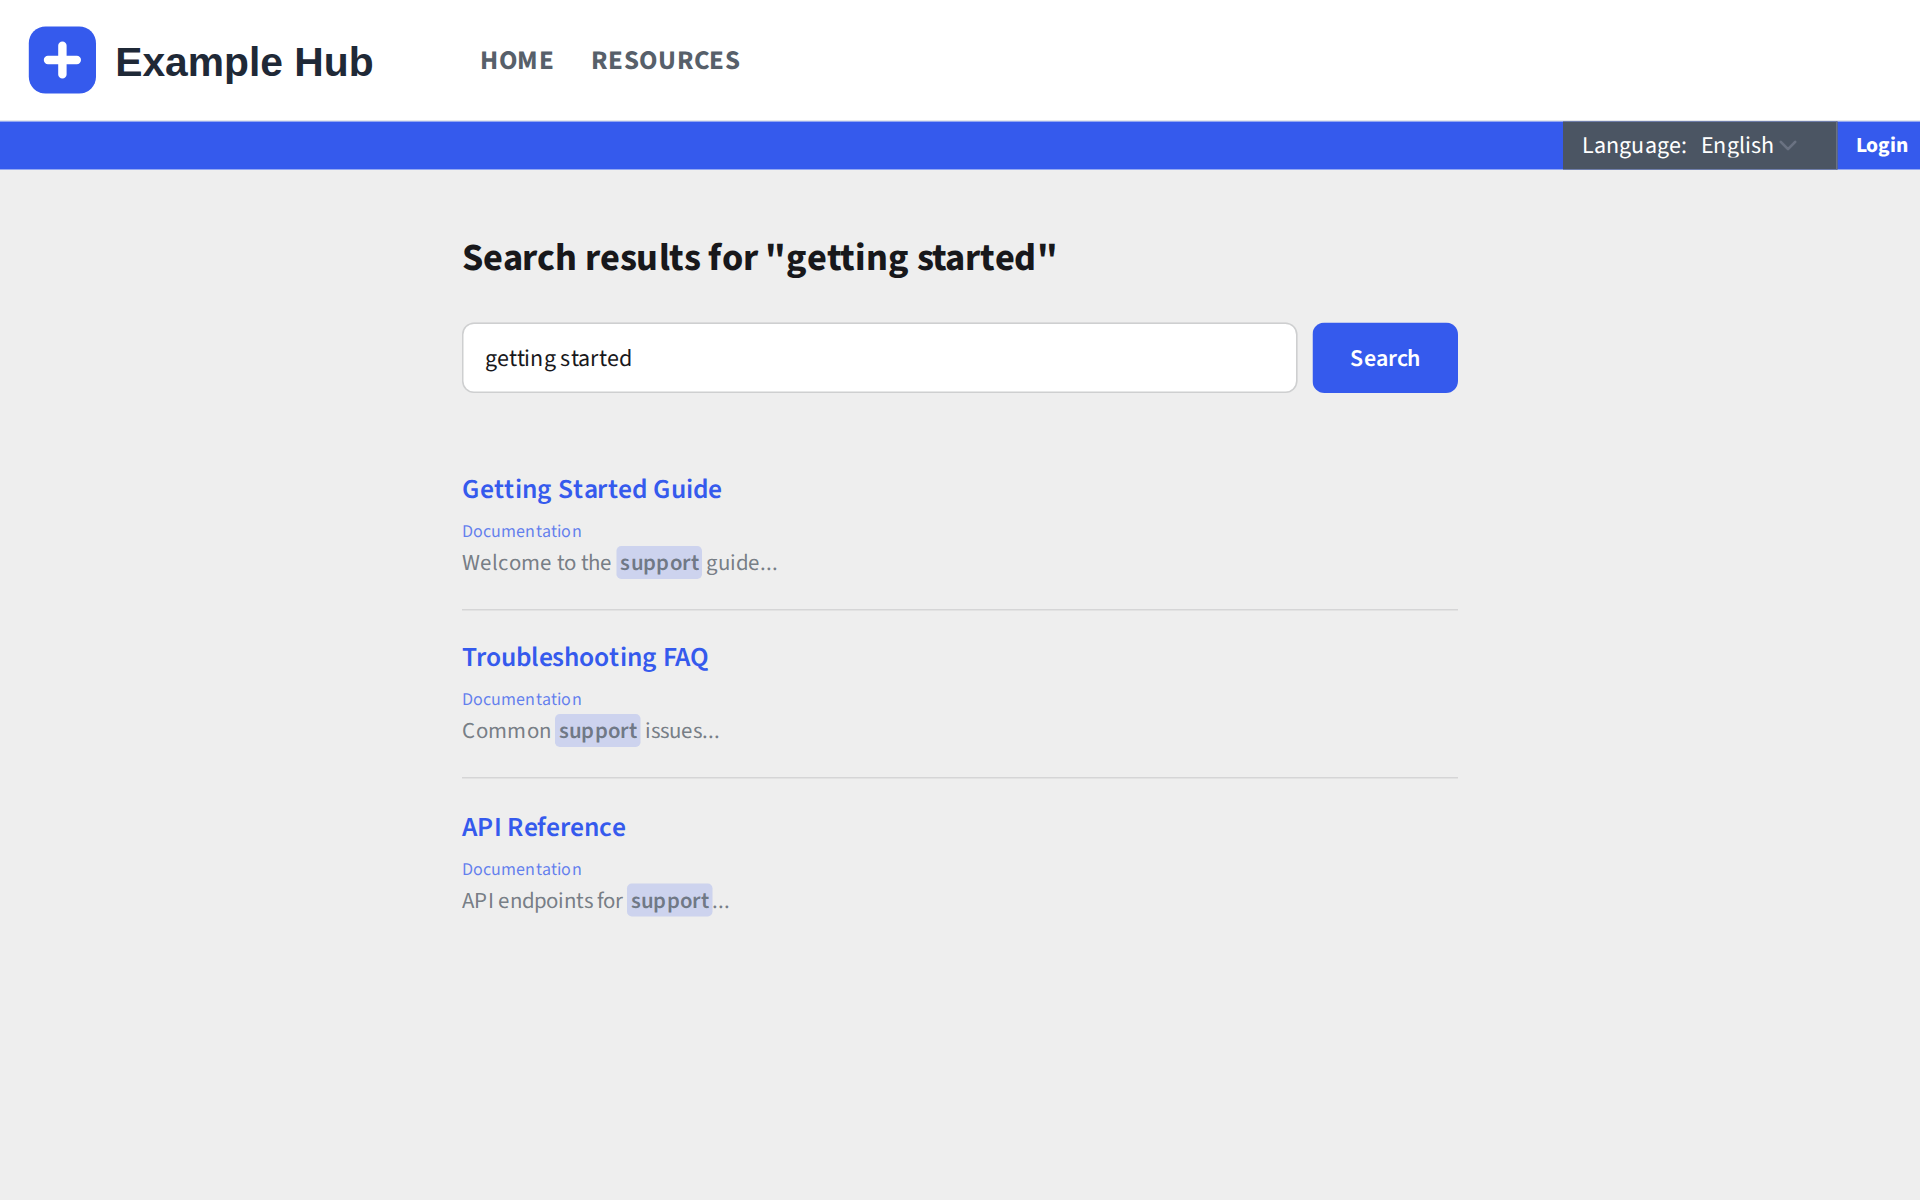
A search box covering your documents and, if you have one, your forum. Results show where each match came from.
Buttons
A row of links styled as buttons, for example to popular topics or other pages.

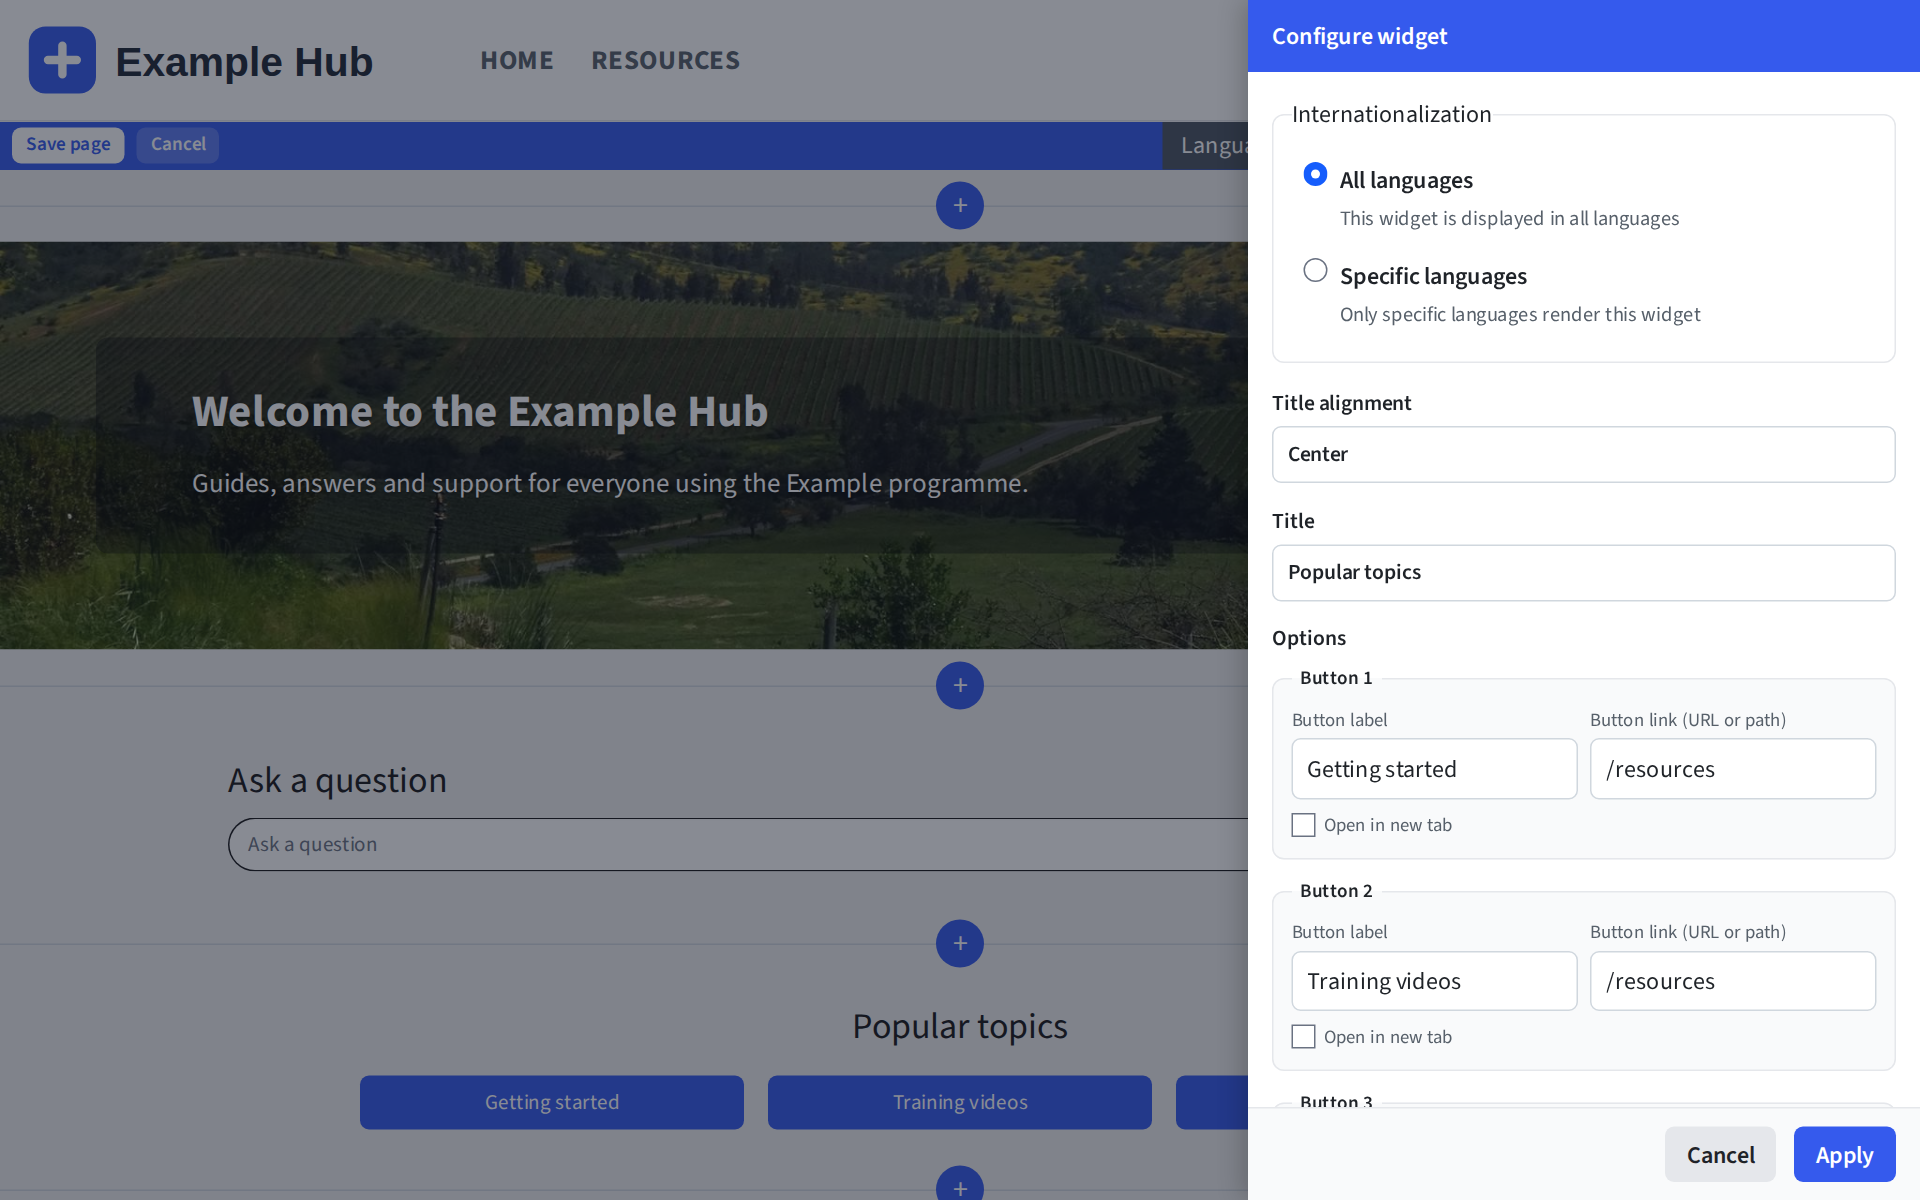
Settings: a title, then one row per button, each with its label and link. Tick Open in new tab for links to other sites.
Docs Category
A list of documents, each published from a Google Doc. See Documents from Google Docs, below.

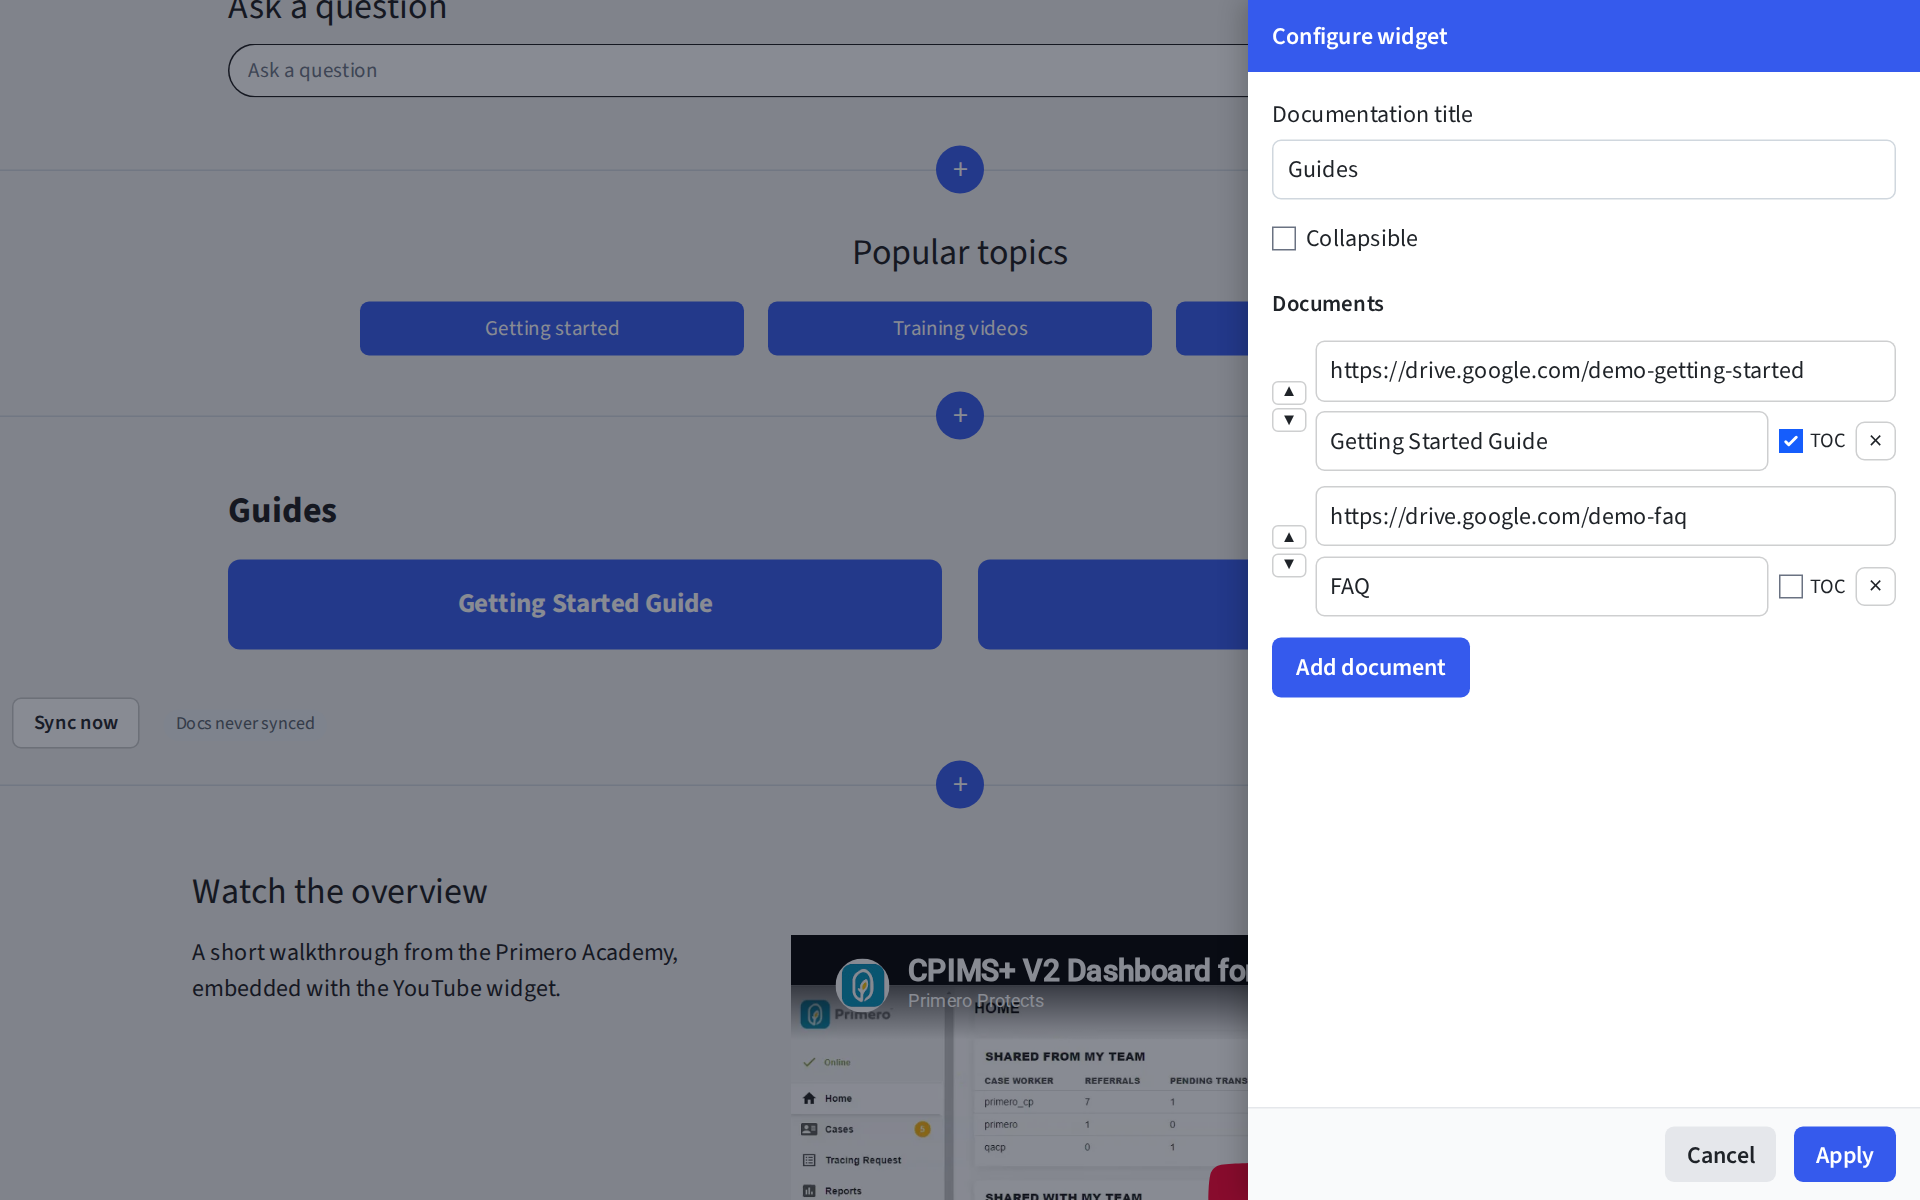
Settings: a heading, Collapsible (shows the list as a heading that opens with an arrow), and the documents: paste each Google Doc's URL, give it a title, and tick TOC for a table of contents beside the document. Use the arrows to reorder documents. Sync now fetches the latest version of every document in the widget.
YouTube
An embedded YouTube video, or a whole playlist, with an optional title and description beside it.
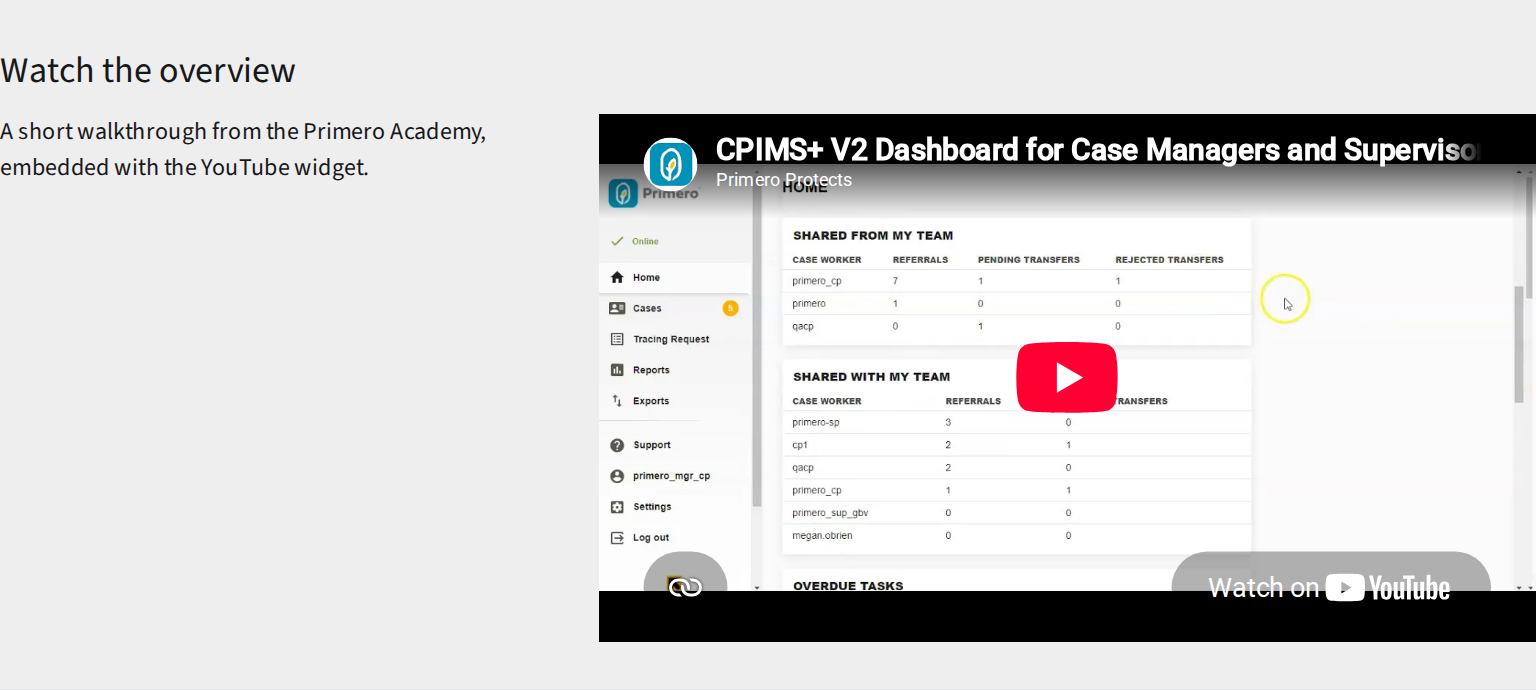
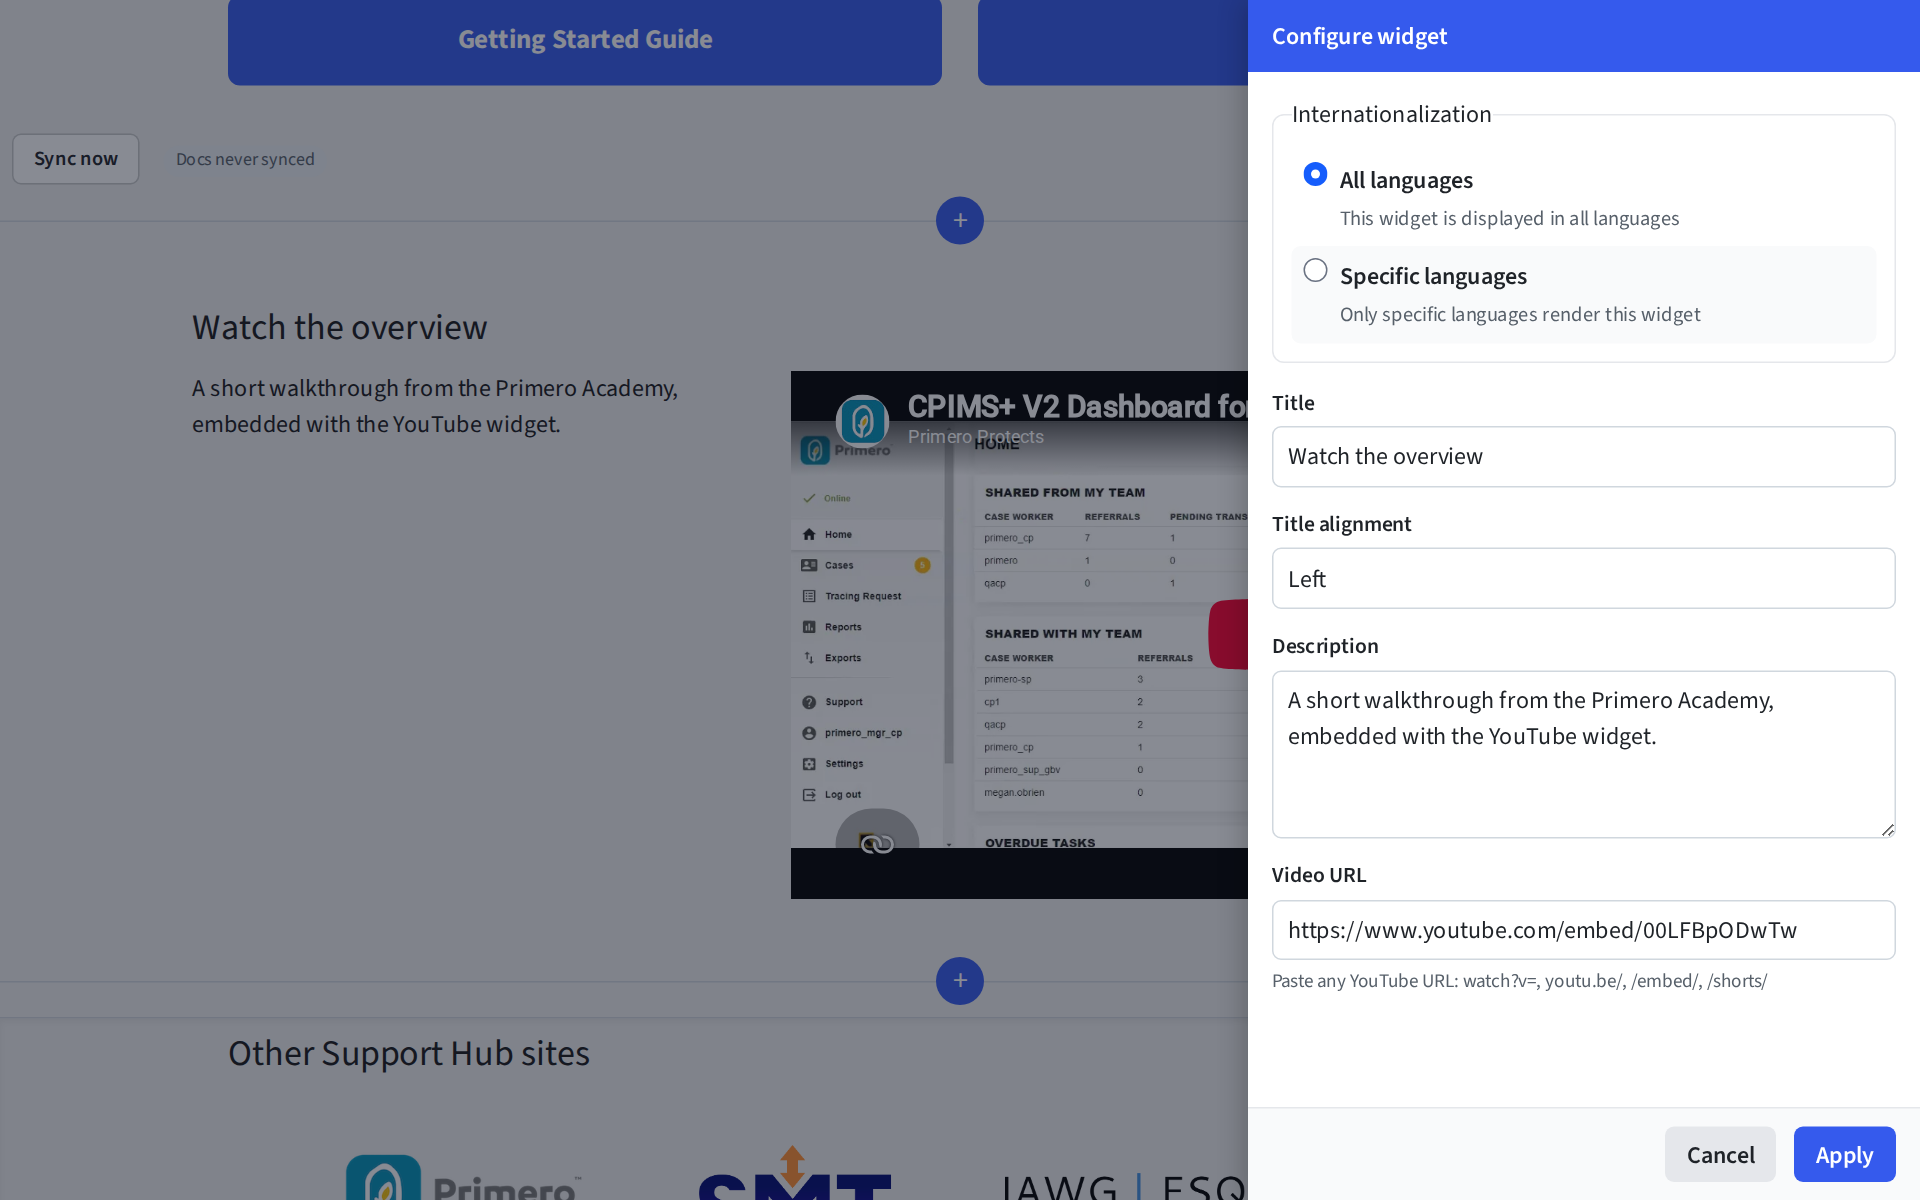
Settings: paste any YouTube link (watch?v=, youtu.be/, /embed/, /shorts/, or a playlist link). With a playlist, new videos you add to it on YouTube appear on the page automatically.
Footer
A strip at the bottom of the page with a title, a subtitle and up to six images, each with a link and a caption. Typically used for partner logos.

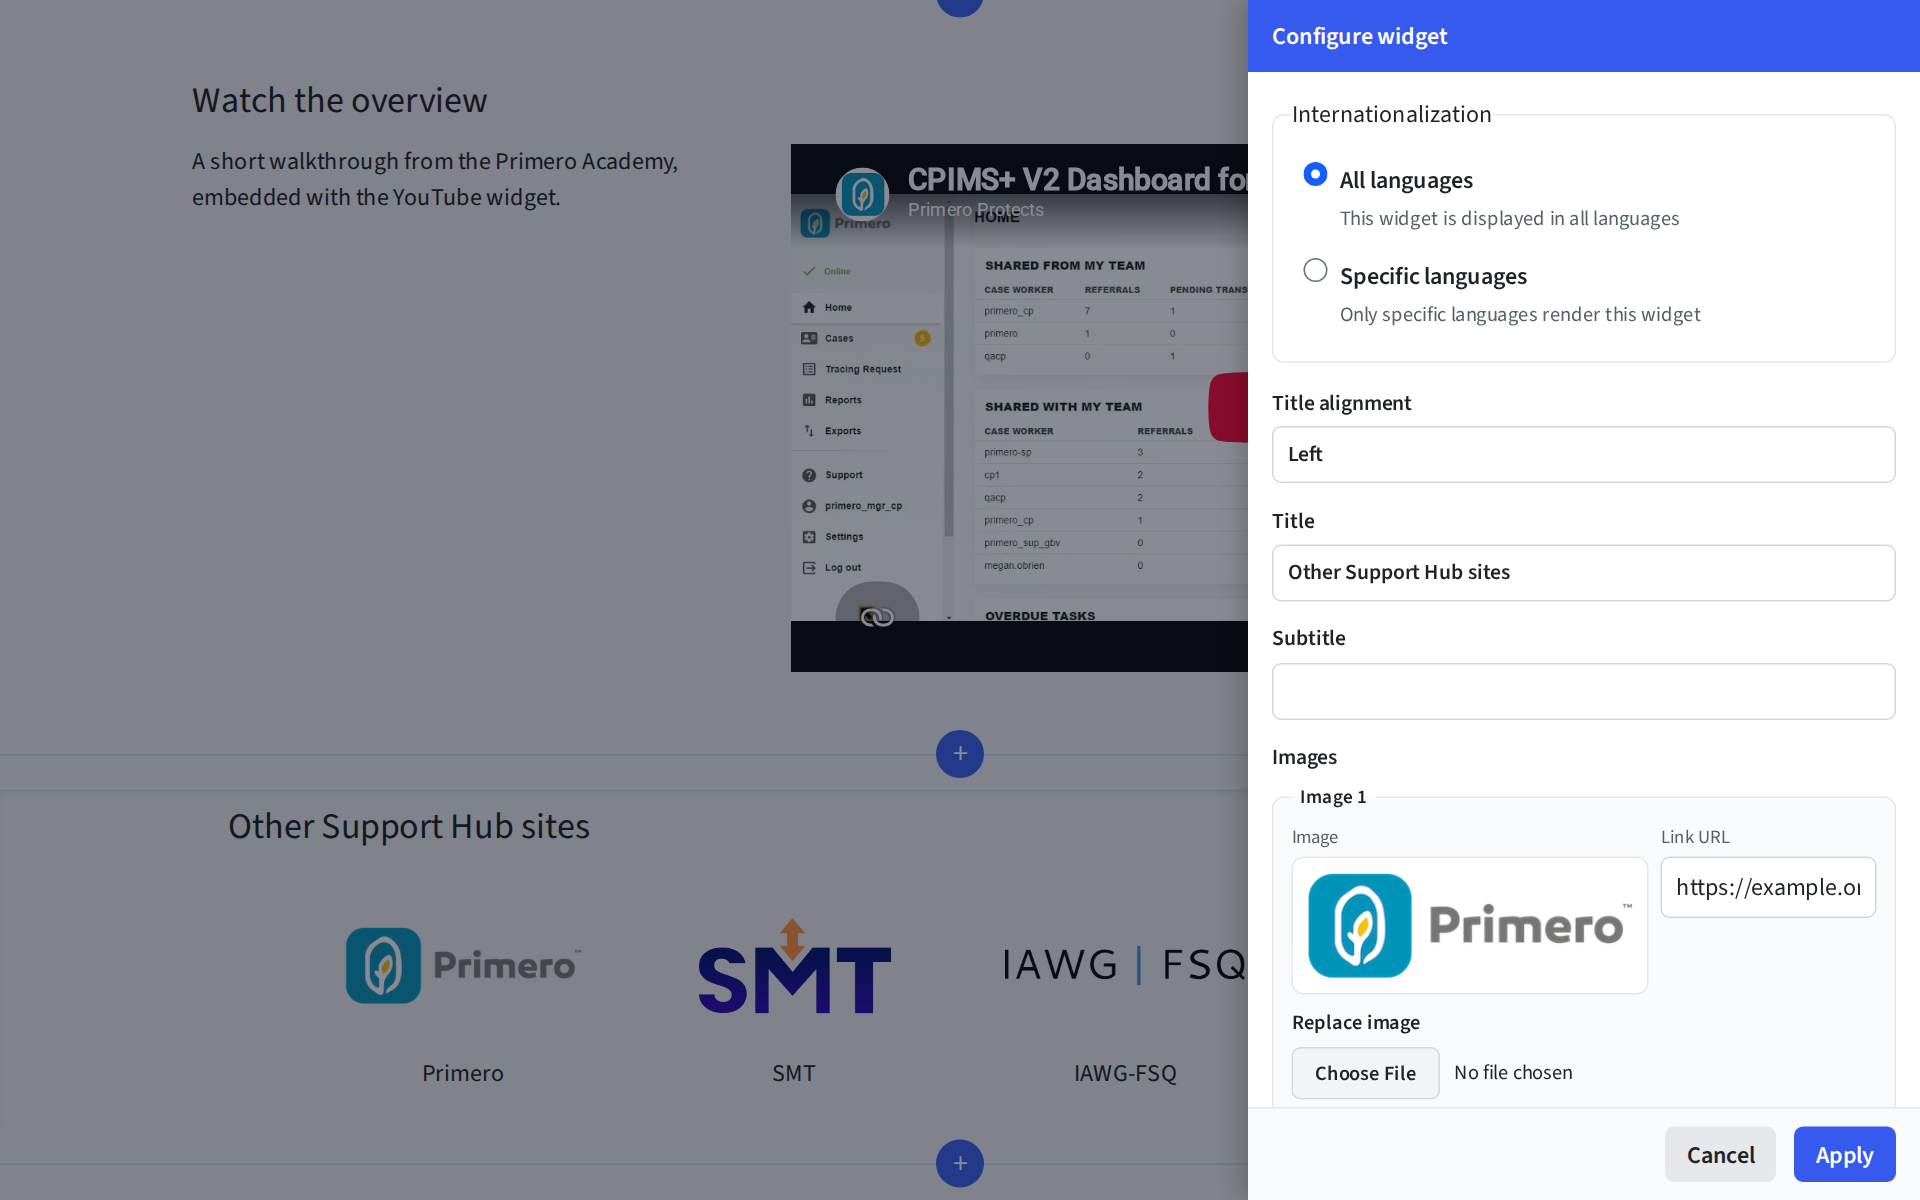
Settings: title, subtitle, and for each image: upload it, its link, its alt text (read aloud by screen readers) and its caption. PNG images with a transparent background look best.
The other widgets
Content
- Image: a single uploaded picture, with alt text and alignment.
- Markdown: formatted text written in Markdown, with an optional banner image.
- Embed: another web page shown inside this one. Only https:// addresses work, and the site must be on your hub's list of allowed embed sites: ask the Support Hub team to add a new one.
Community (needs Discourse)
- Discourse Category: the latest topics from one forum category.
- Roadmap: what's planned and what has shipped, built from forum suggestions, their votes and their status tags (for example backlog, roadmap, shipped).
Support
- Ask AI and Search: see above.
- Heyform (needs HeyForm): one of your forms, filled in on the page. Pick an existing form or create a new one.
Documentation
- Docs Category: see above.
- GitHub Releases: release notes from a public GitHub repository, given as owner/name.
Layout
- Buttons and Footer: see above.
- Spacer: empty space between sections.
Advanced
- Custom HTML: raw HTML, for anything the other widgets can't do. Scripts and other unsafe code are removed when you save.
Documents from Google Docs
Documents are written and kept in Google Docs. Support Hub turns each one into a web page on your site, with a table of contents, section links and an Export PDF button.
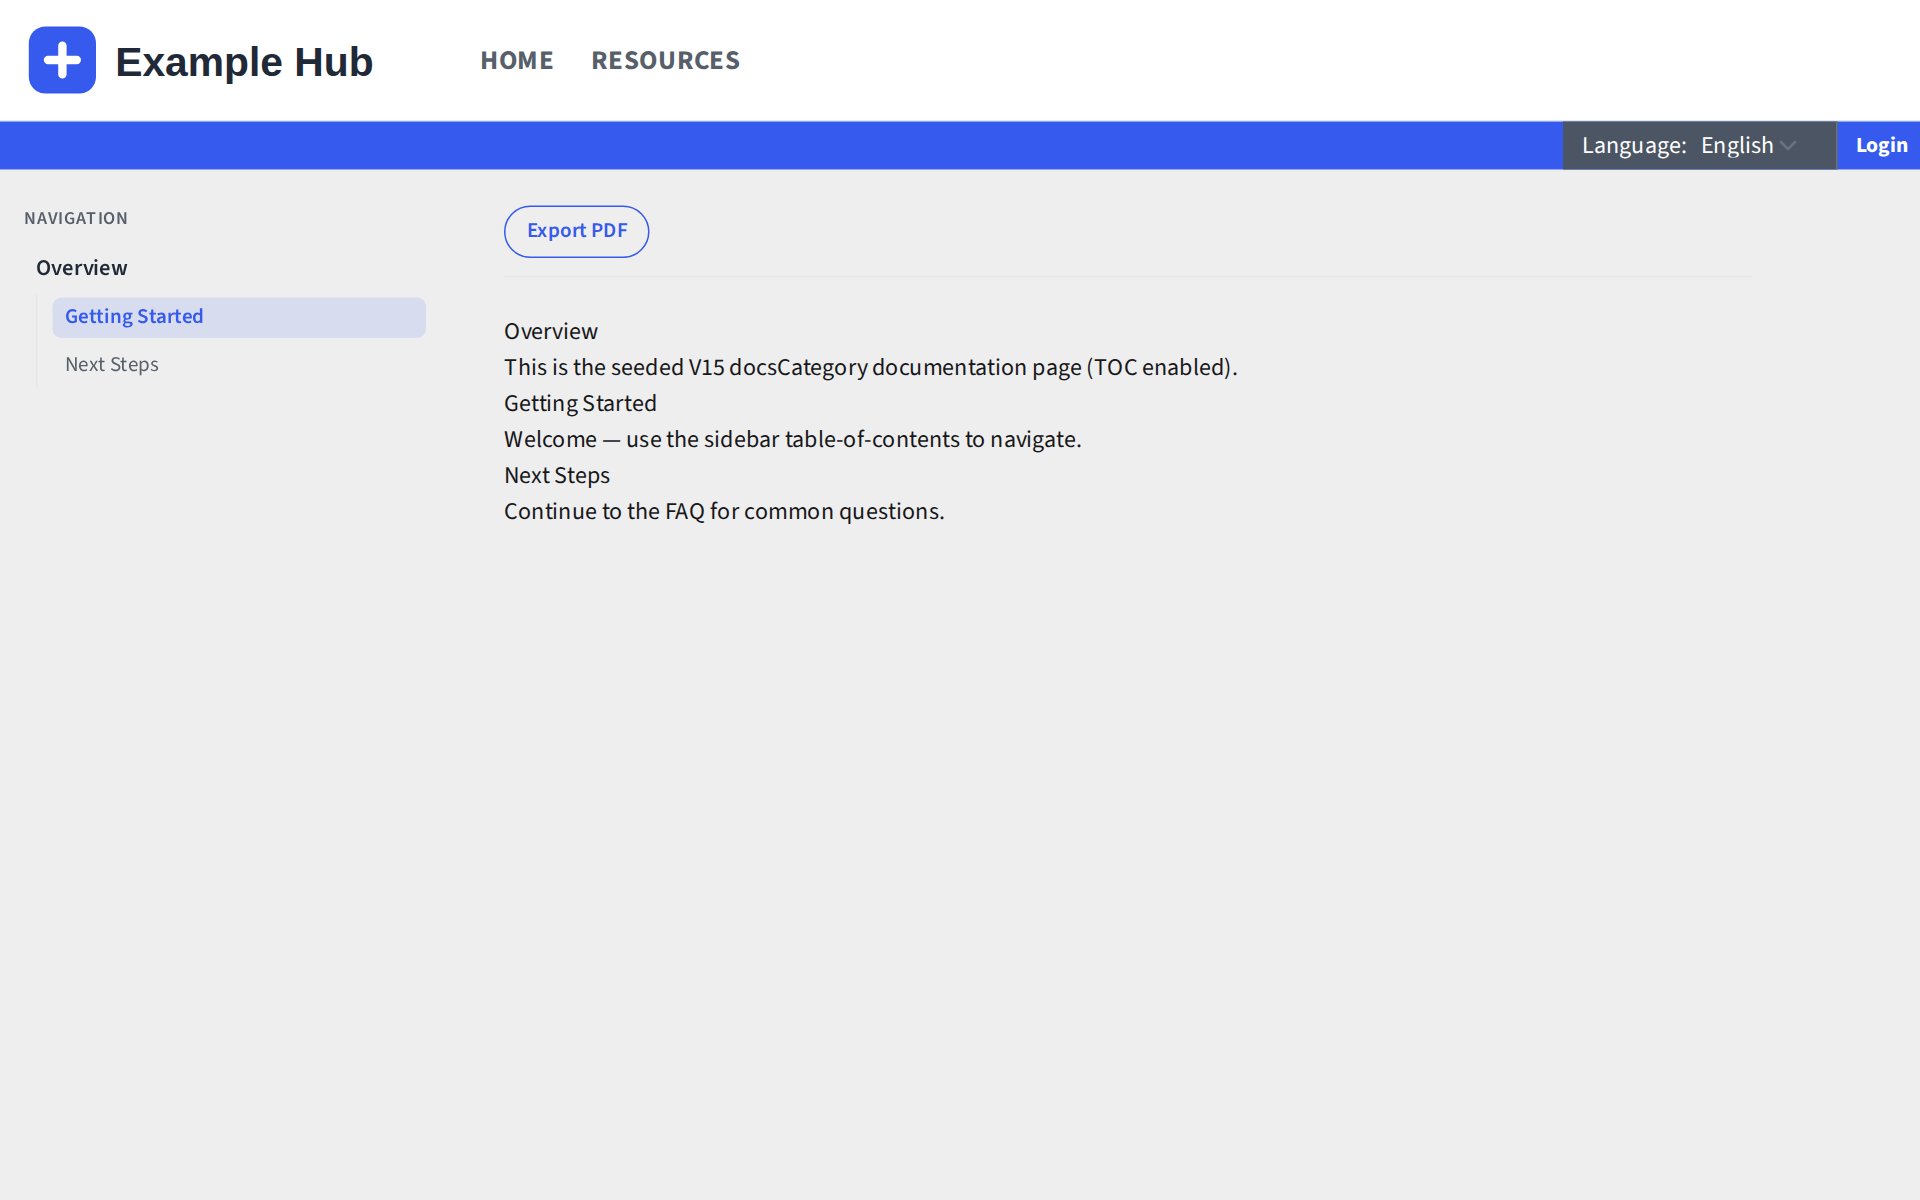
To publish a document:
- Connect Google once. Under Admin → Integrations → Google Workspace, paste your service account's JSON key. The page then shows the service account's email address.
- Share the document with that email address, as a Viewer. This is the step most often missed: an unshared document fails to sync.
- Add it to a Docs Category widget: paste the document's URL into the widget's settings, Apply, and Save page.
Support Hub fetches the document and builds the page, usually within a minute. The widget shows its sync status, and the status of the document's Ask AI indexing.
Updating a document: edit it in Google Docs as usual, then select Sync now on its Docs Category widget (in edit mode). Changes don't appear on the site until you sync.
Every published document is searchable, and Ask AI uses it to answer questions.
Admin
Select Admin on the blue bar. The menu on the left lists every area.
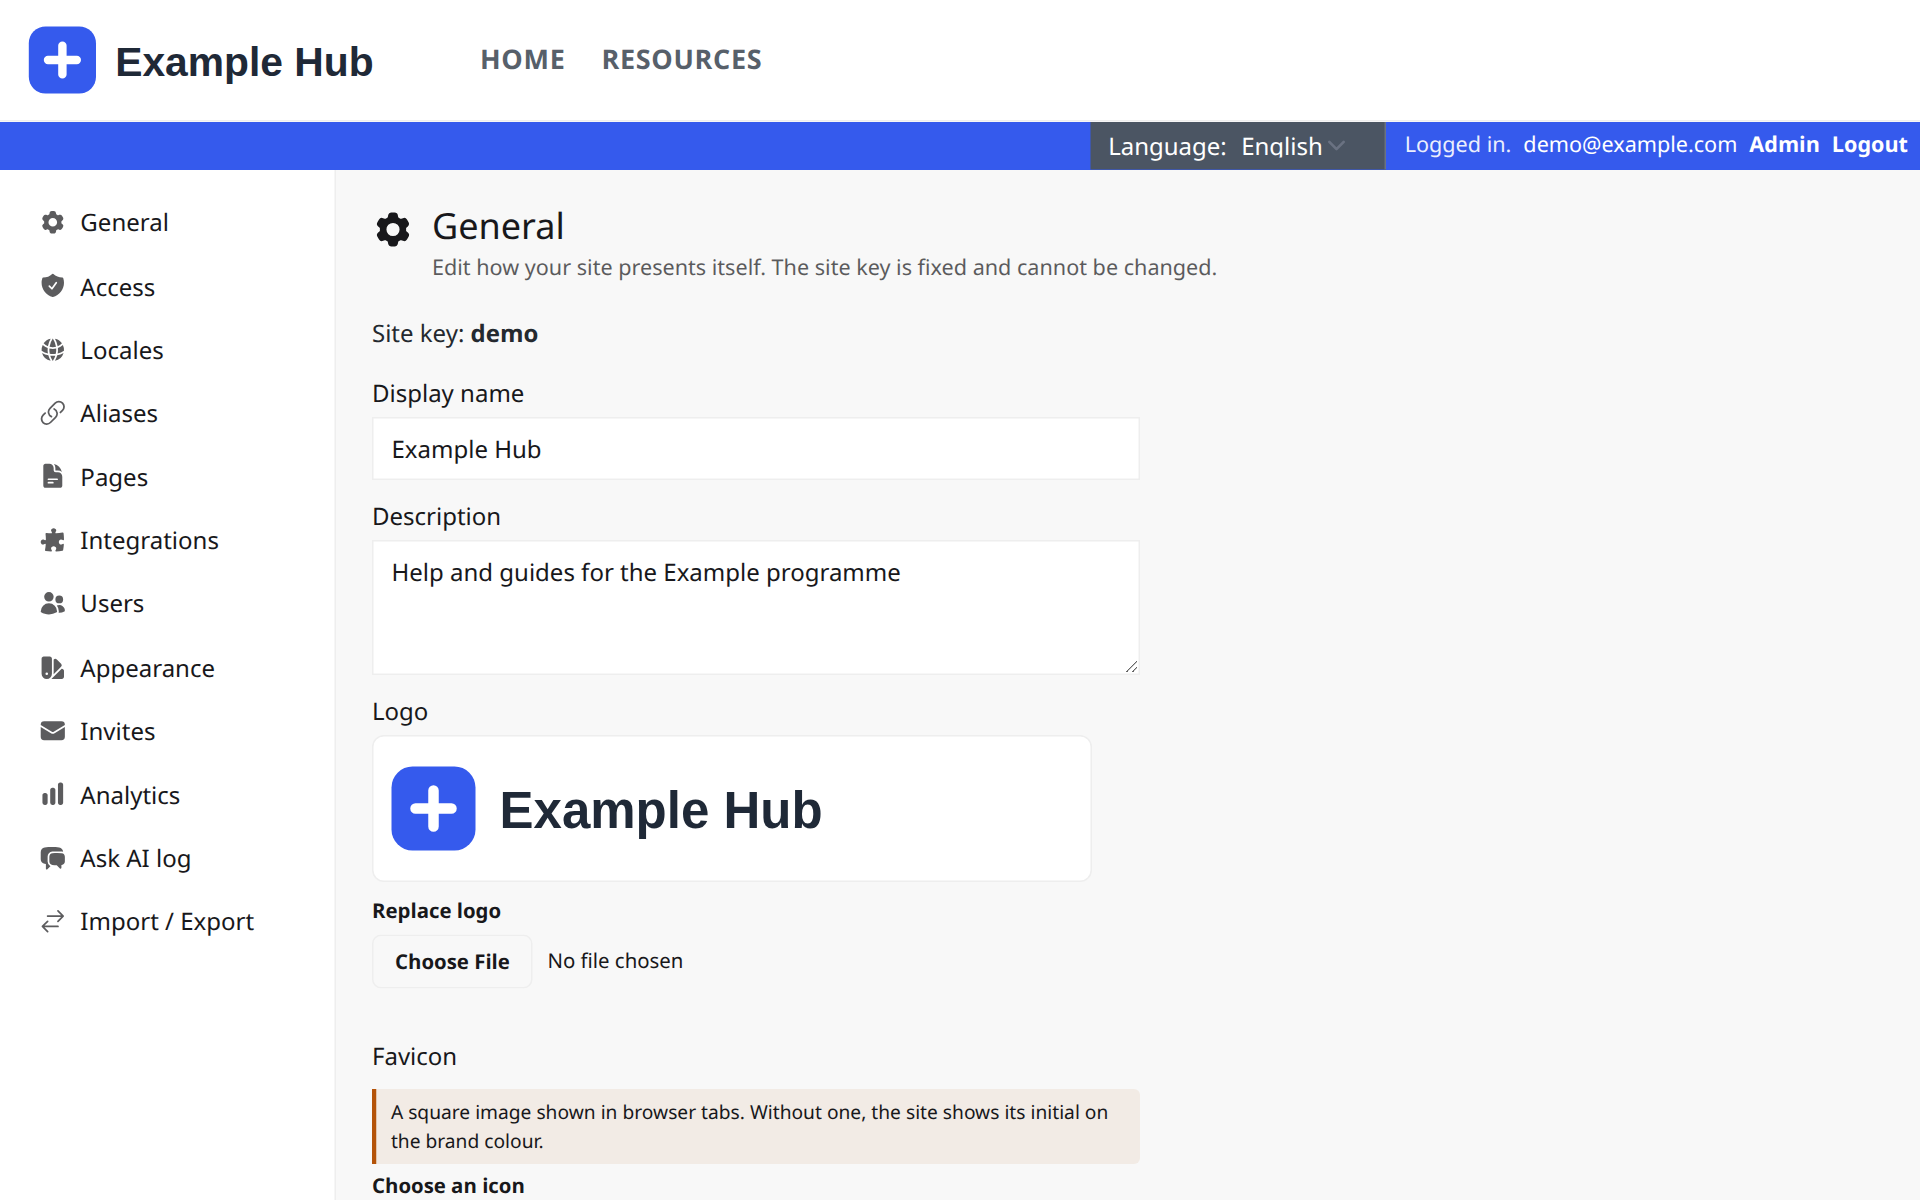
General
The site's display name, description, logo and favicon (the small icon in browser tabs). The site key is fixed.
Appearance
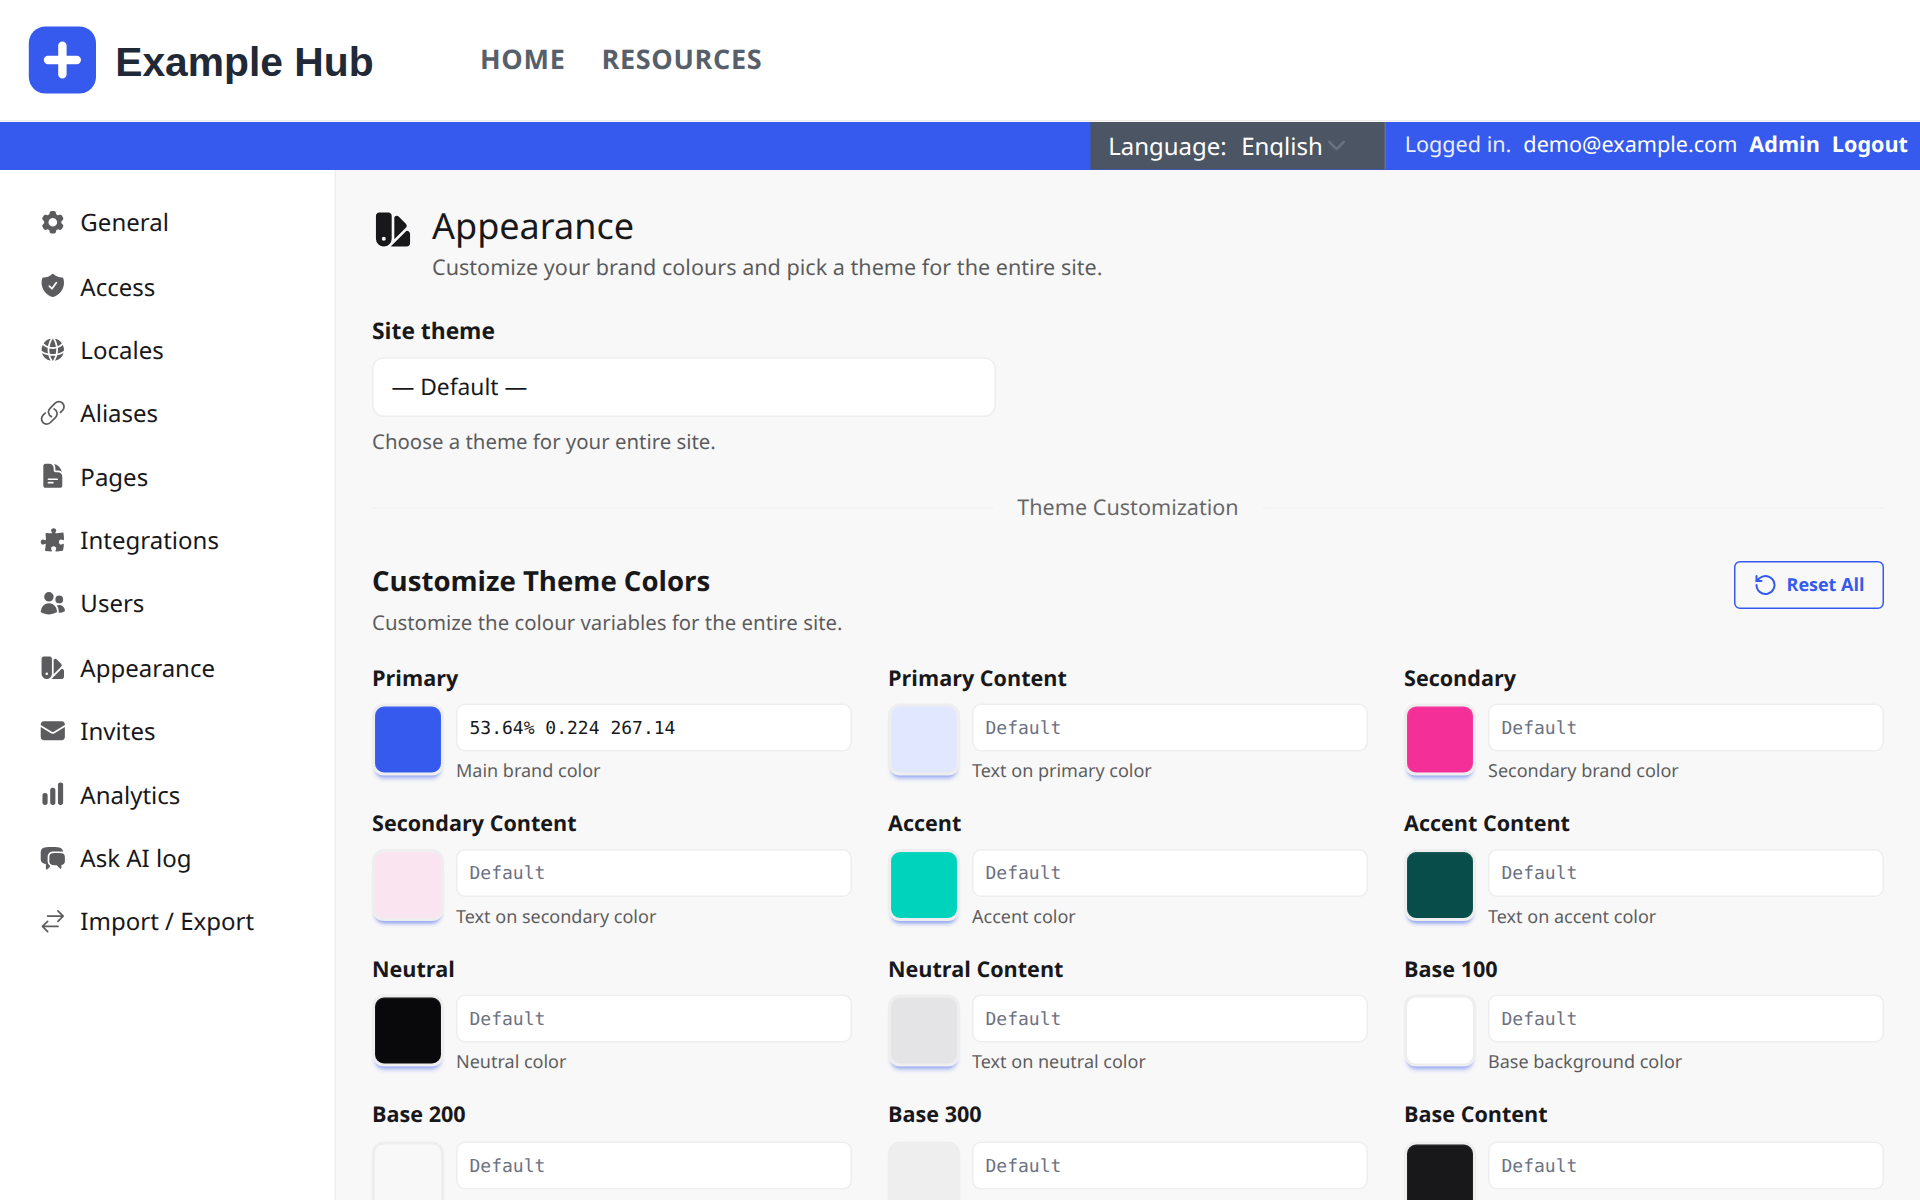
Pick a theme for the whole site, or set your own brand colours: Primary is your main brand colour, and each colour has a matching text colour. Custom CSS is for advanced changes. It applies to the current language only, so set it for each language your site uses.
Locales
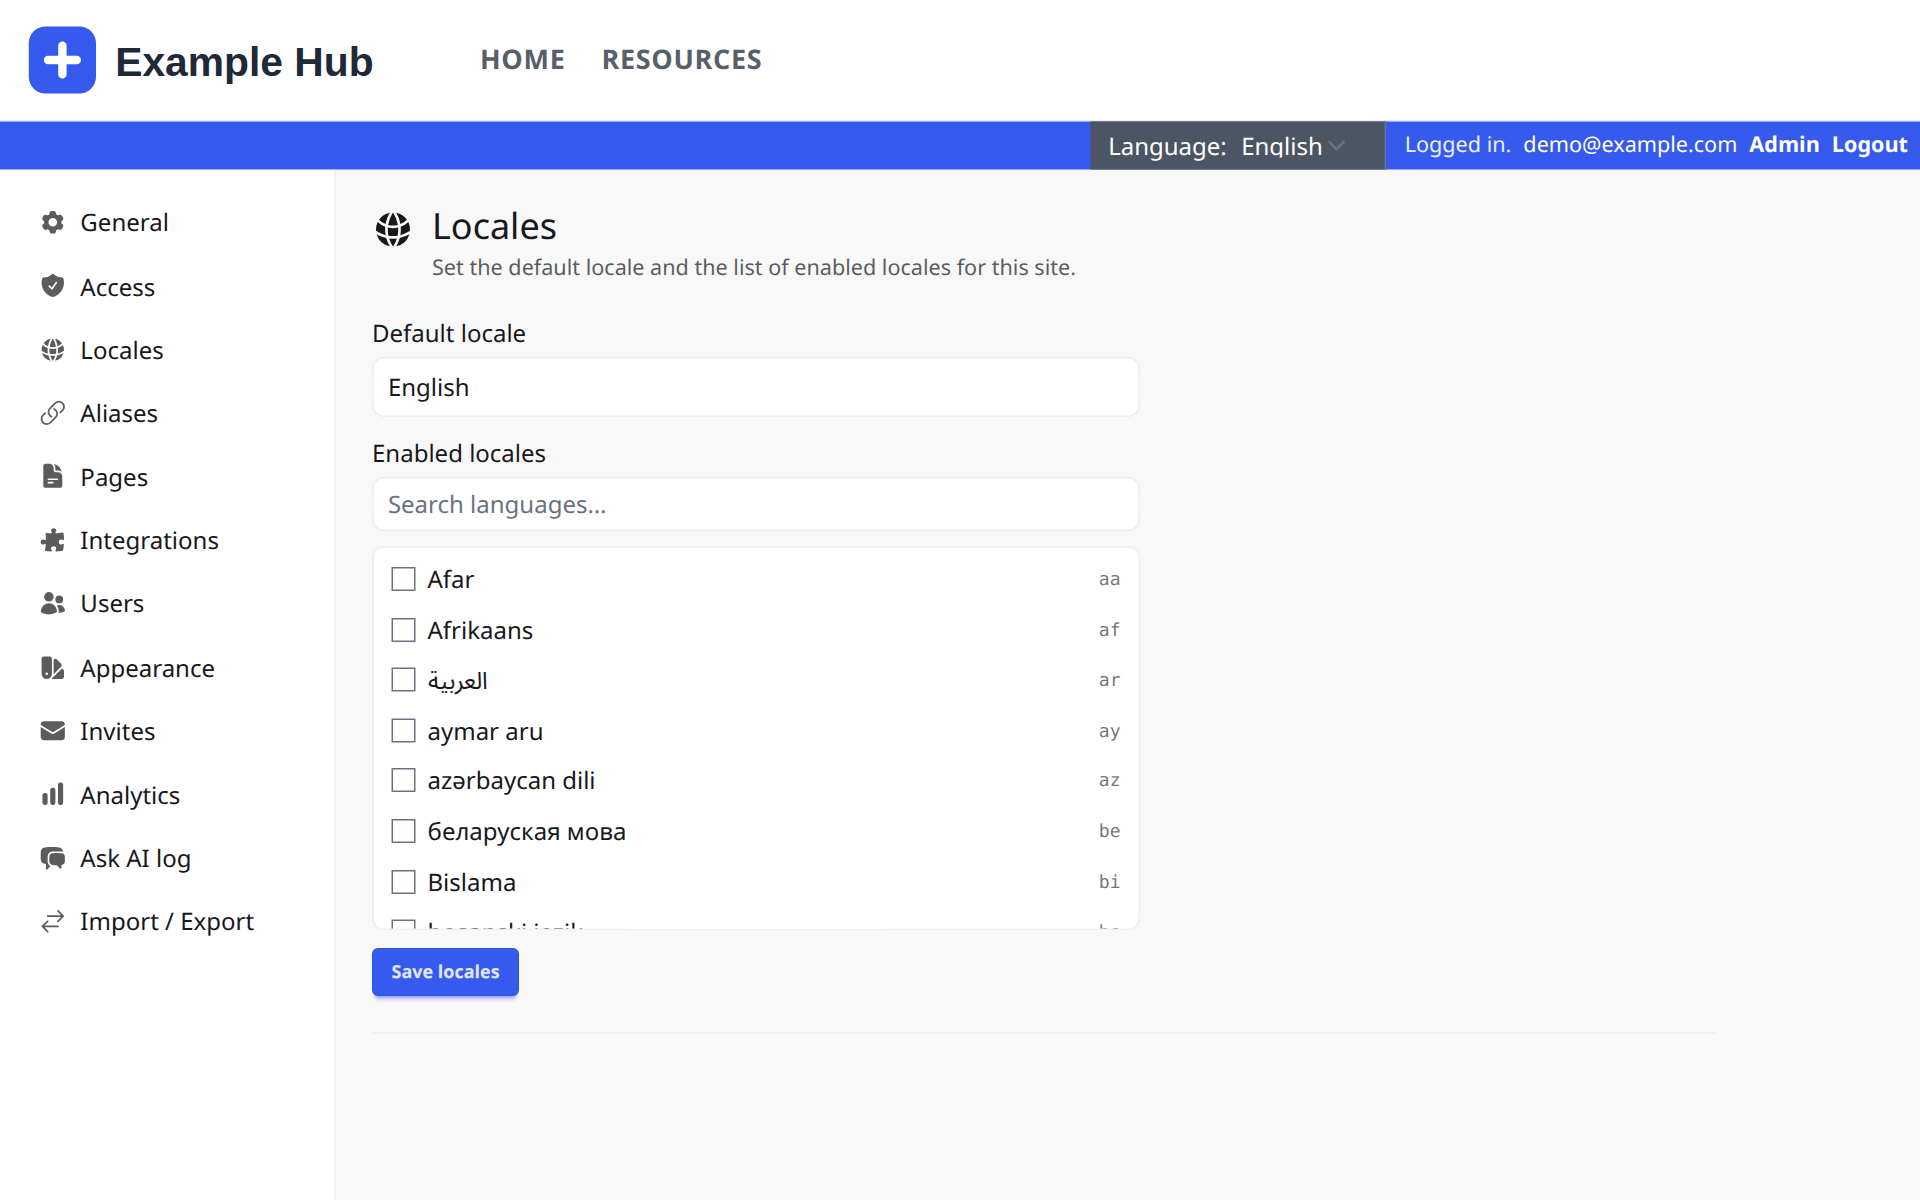
The languages your site offers. Pick a default and tick the others. With more than one language, visitors get a language selector on the blue bar. Each widget can then be shown in all languages or only some (see Configuring a widget).
Access
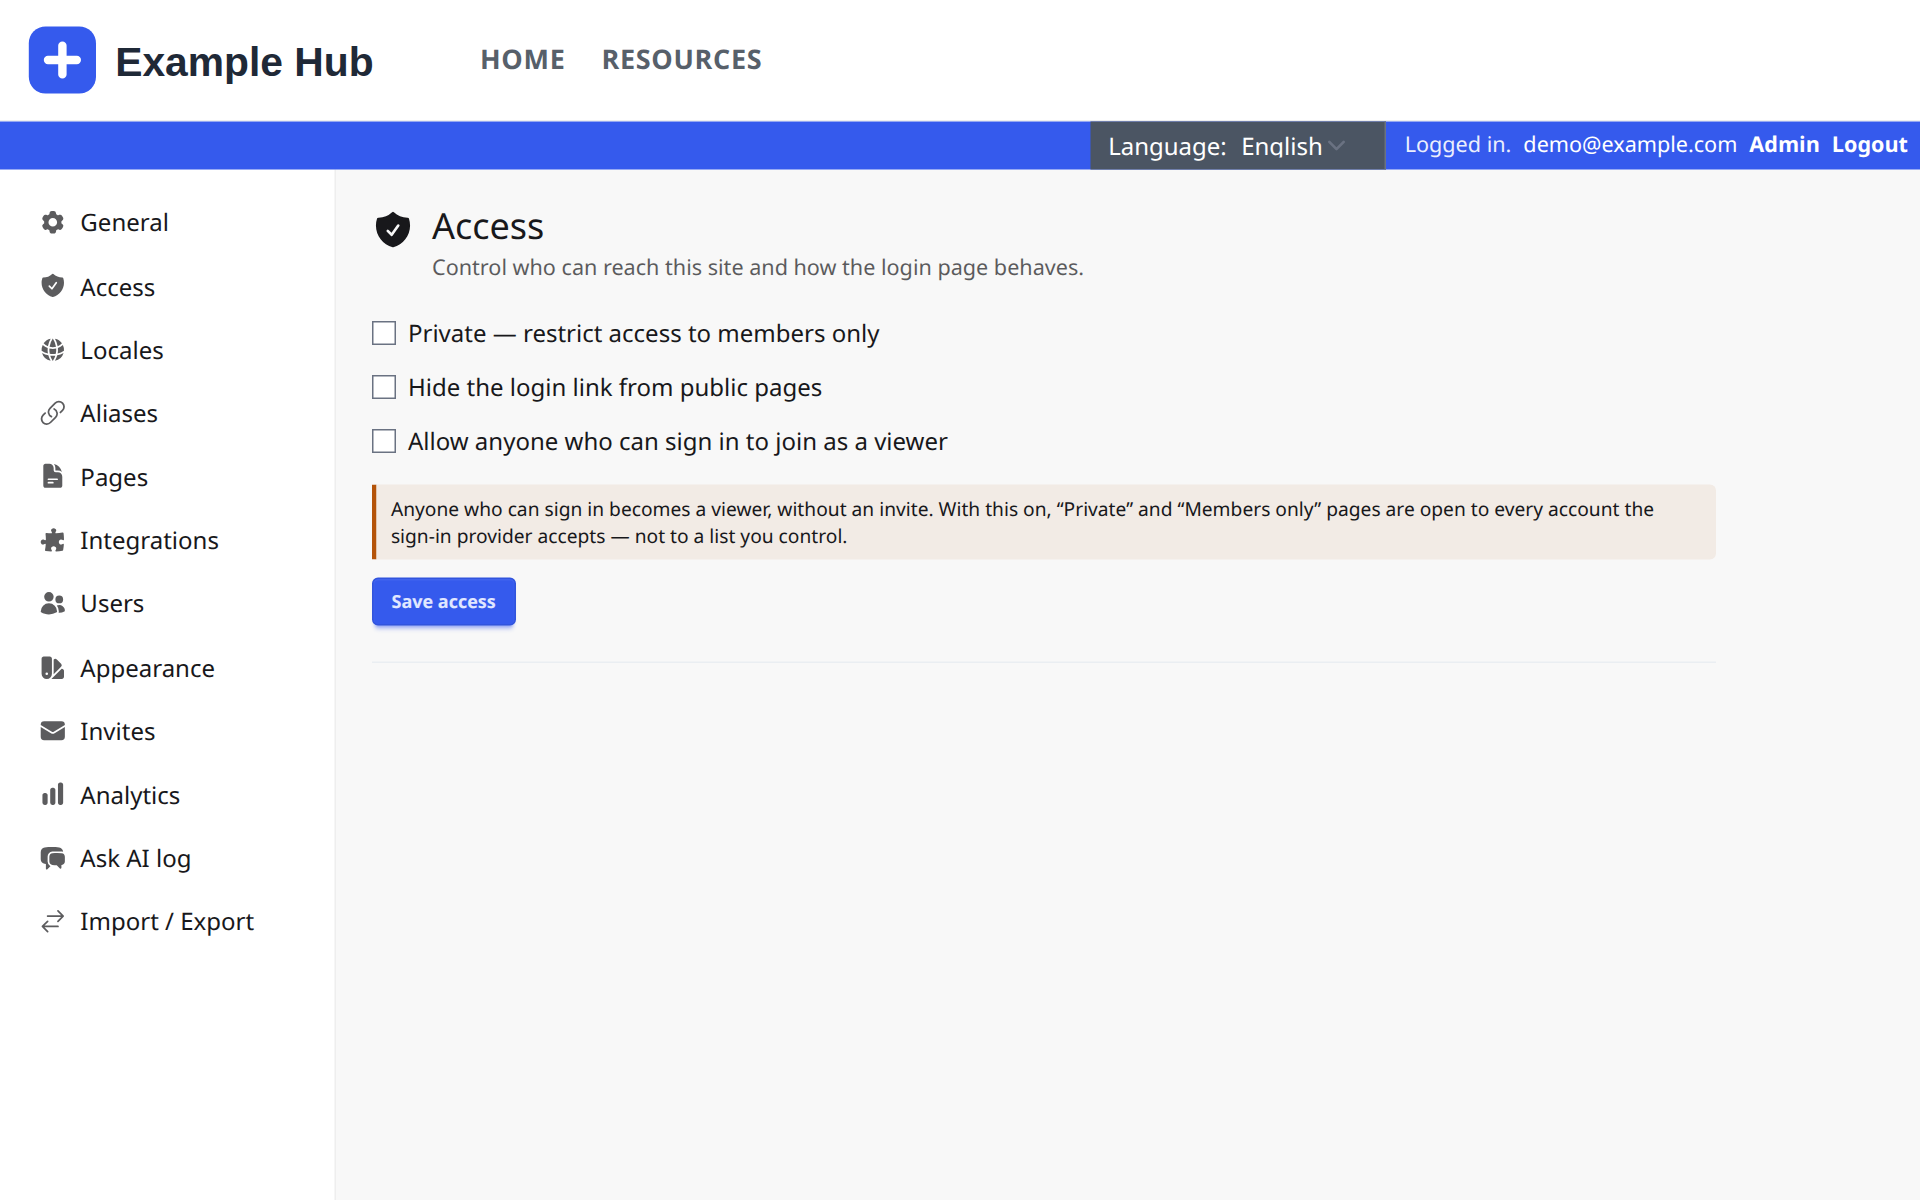
- Private restricts the whole site to signed-in members.
- Hide the login link removes Login from public pages. Admins then sign in at /admin/login.
- Allow anyone who can sign in to join as a viewer lets people in without an invite. With this on, "Private" and "Members only" no longer mean a vetted list of people.
Aliases
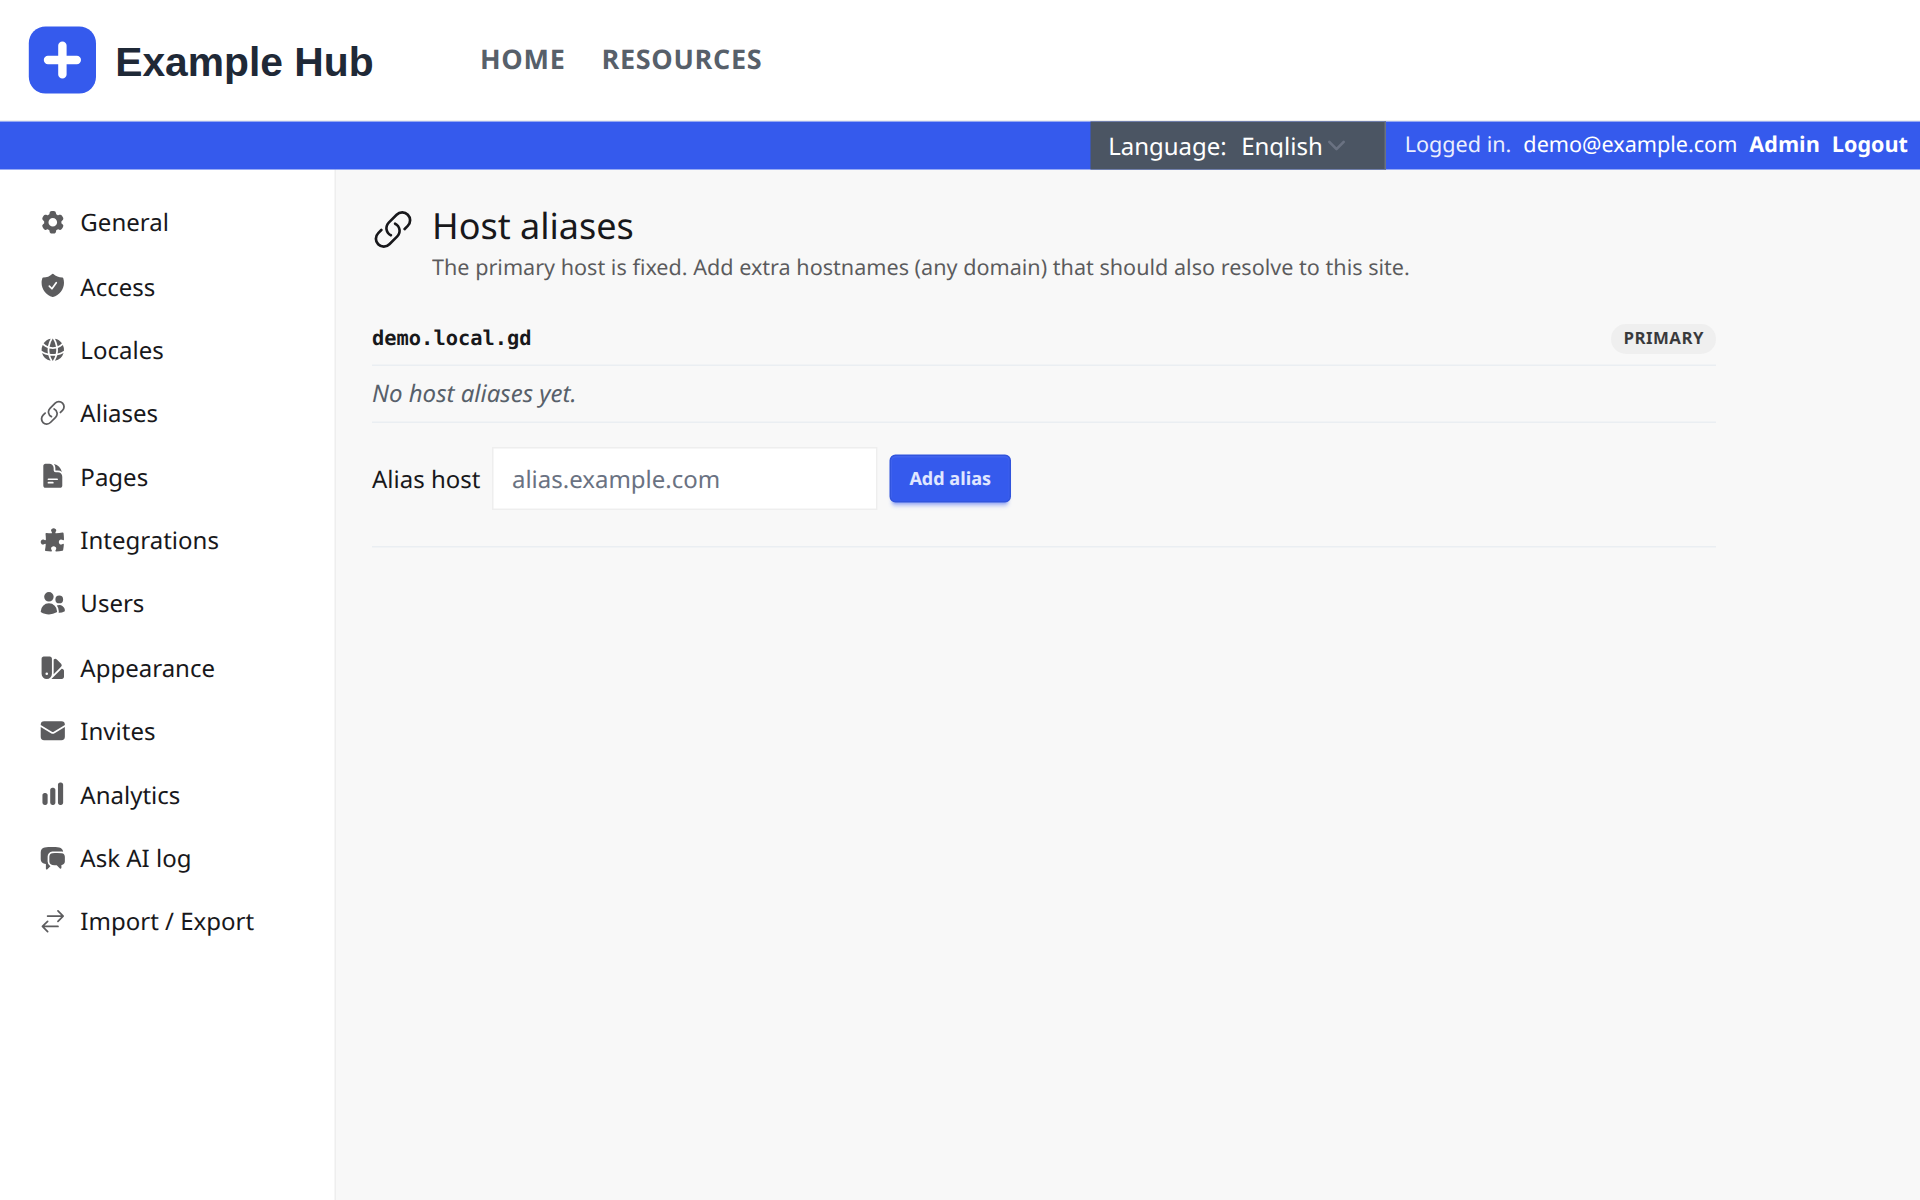
Extra web addresses for the same site, for example your own domain alongside your-site.supporthub.global. The domain's DNS must point at Support Hub too: ask the Support Hub team.
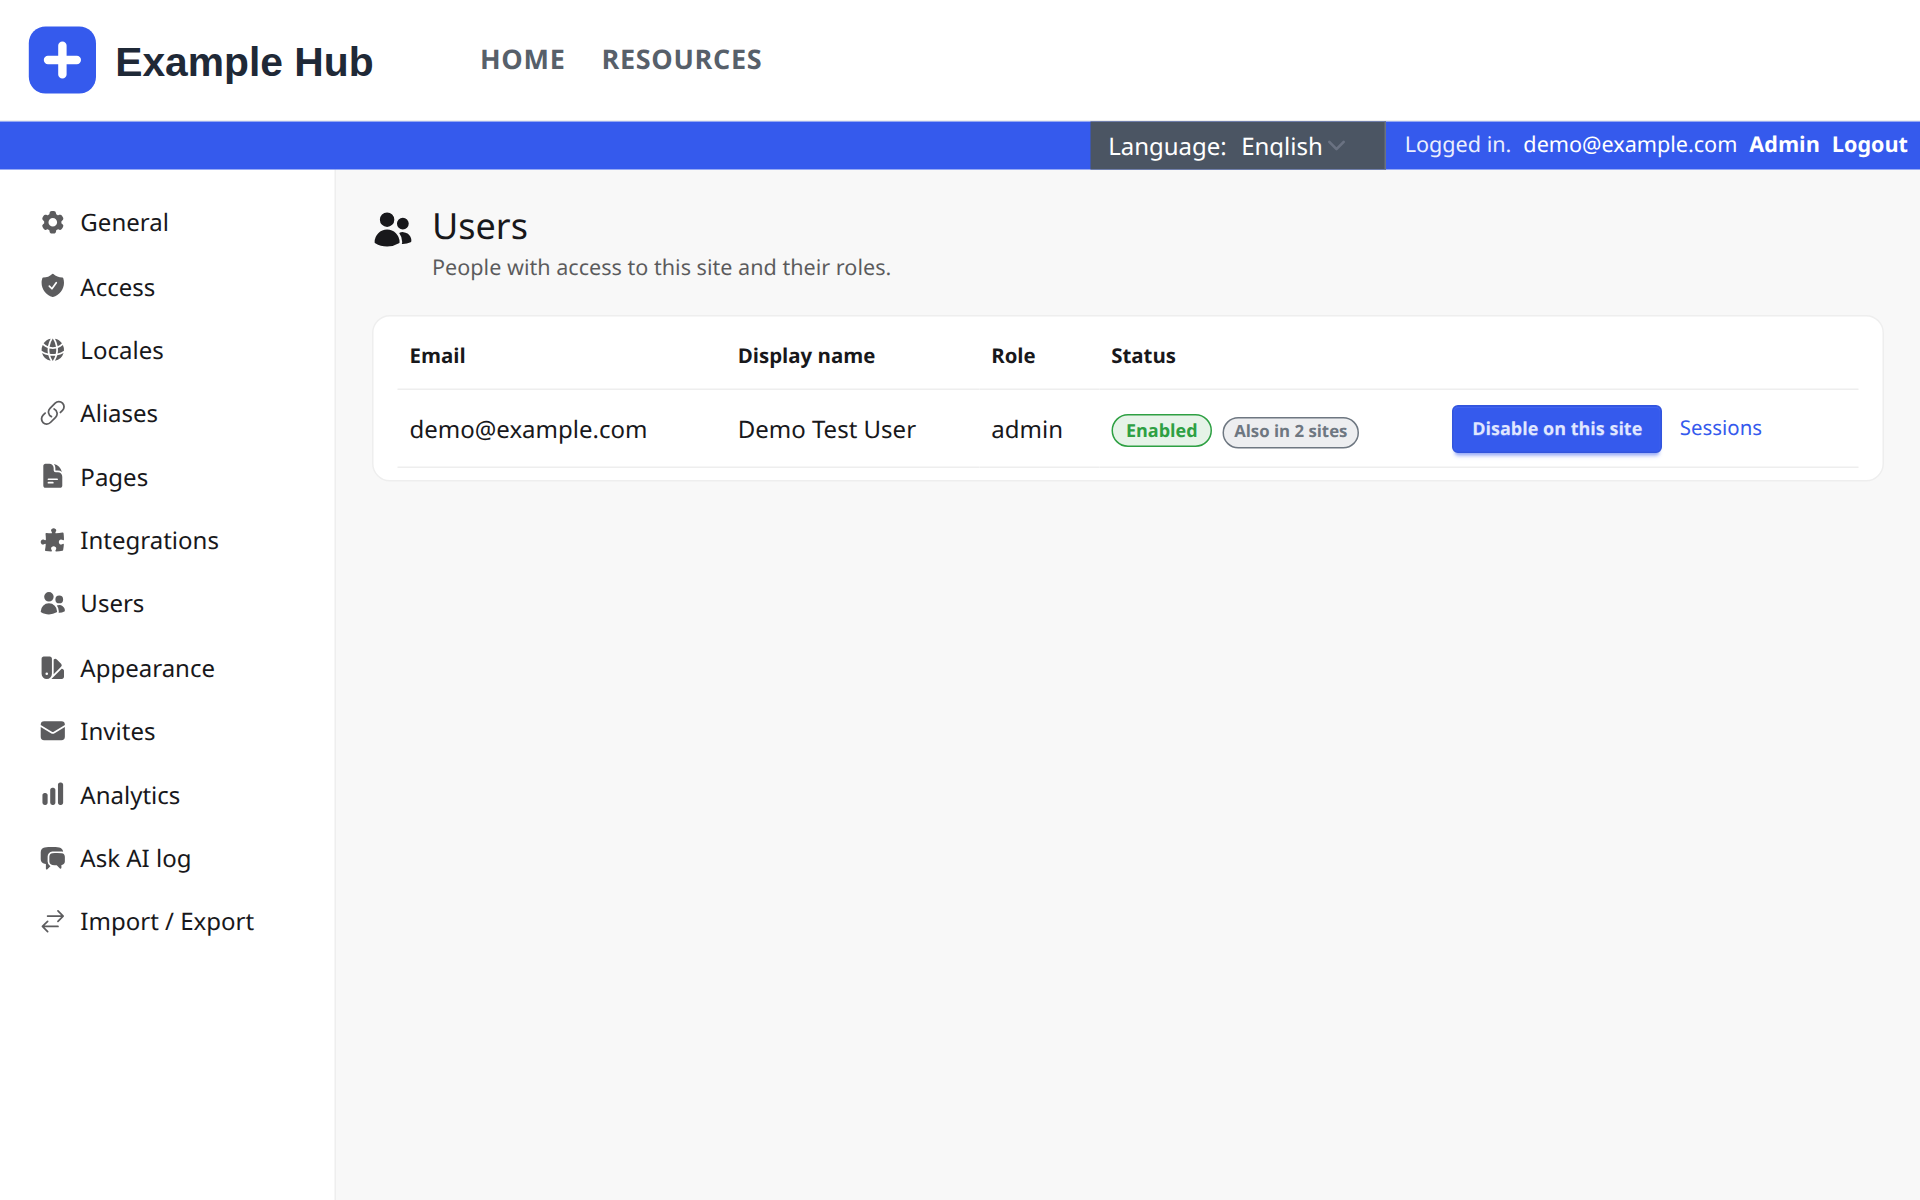
Users
Everyone with access to the site, with their role. Disable on this site removes someone's access here without affecting any other site they use. Sessions shows where they're signed in, and lets you sign them out.
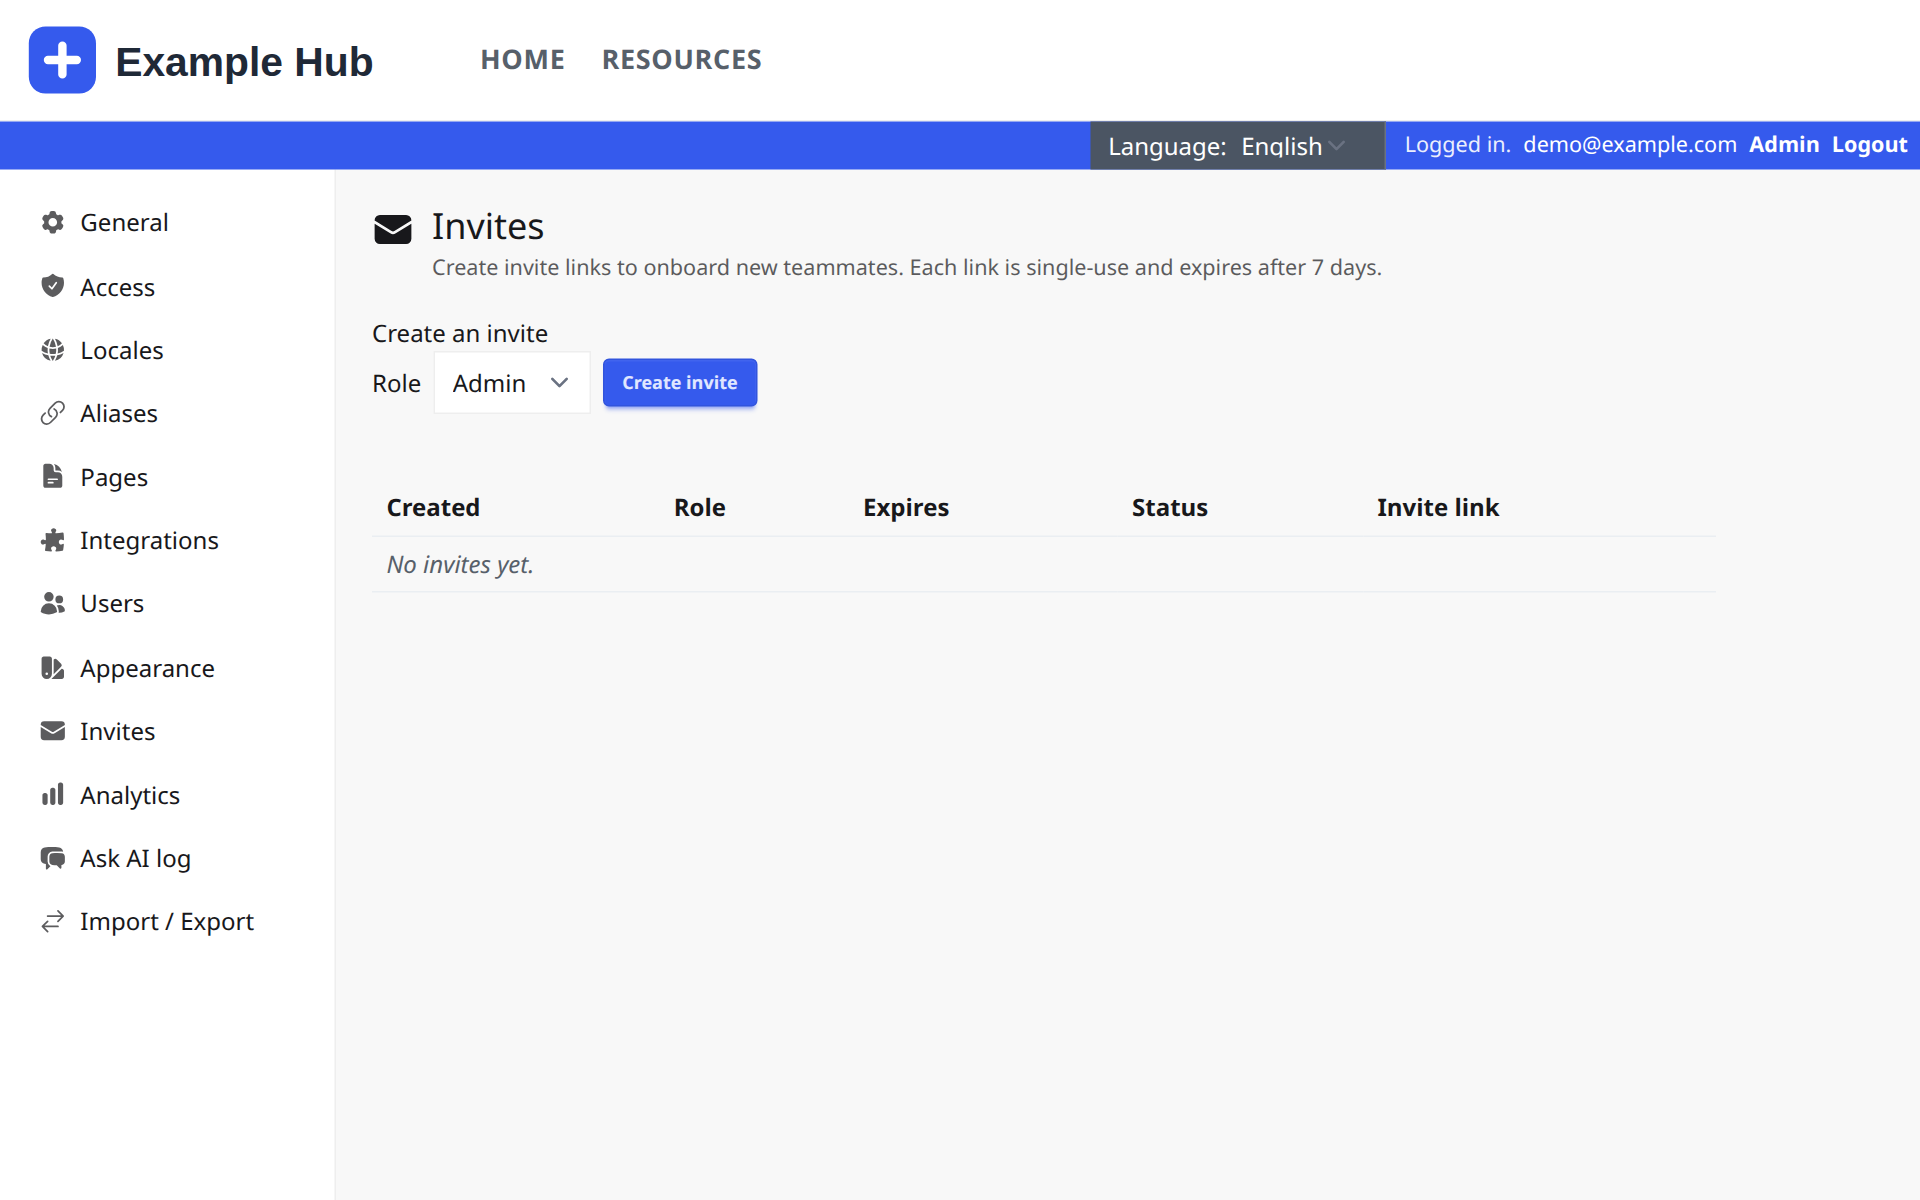
Invites
Create an invite link for a new admin or viewer, and send it to them. Each link works once and expires after 7 days. You can revoke a link that hasn't been used.
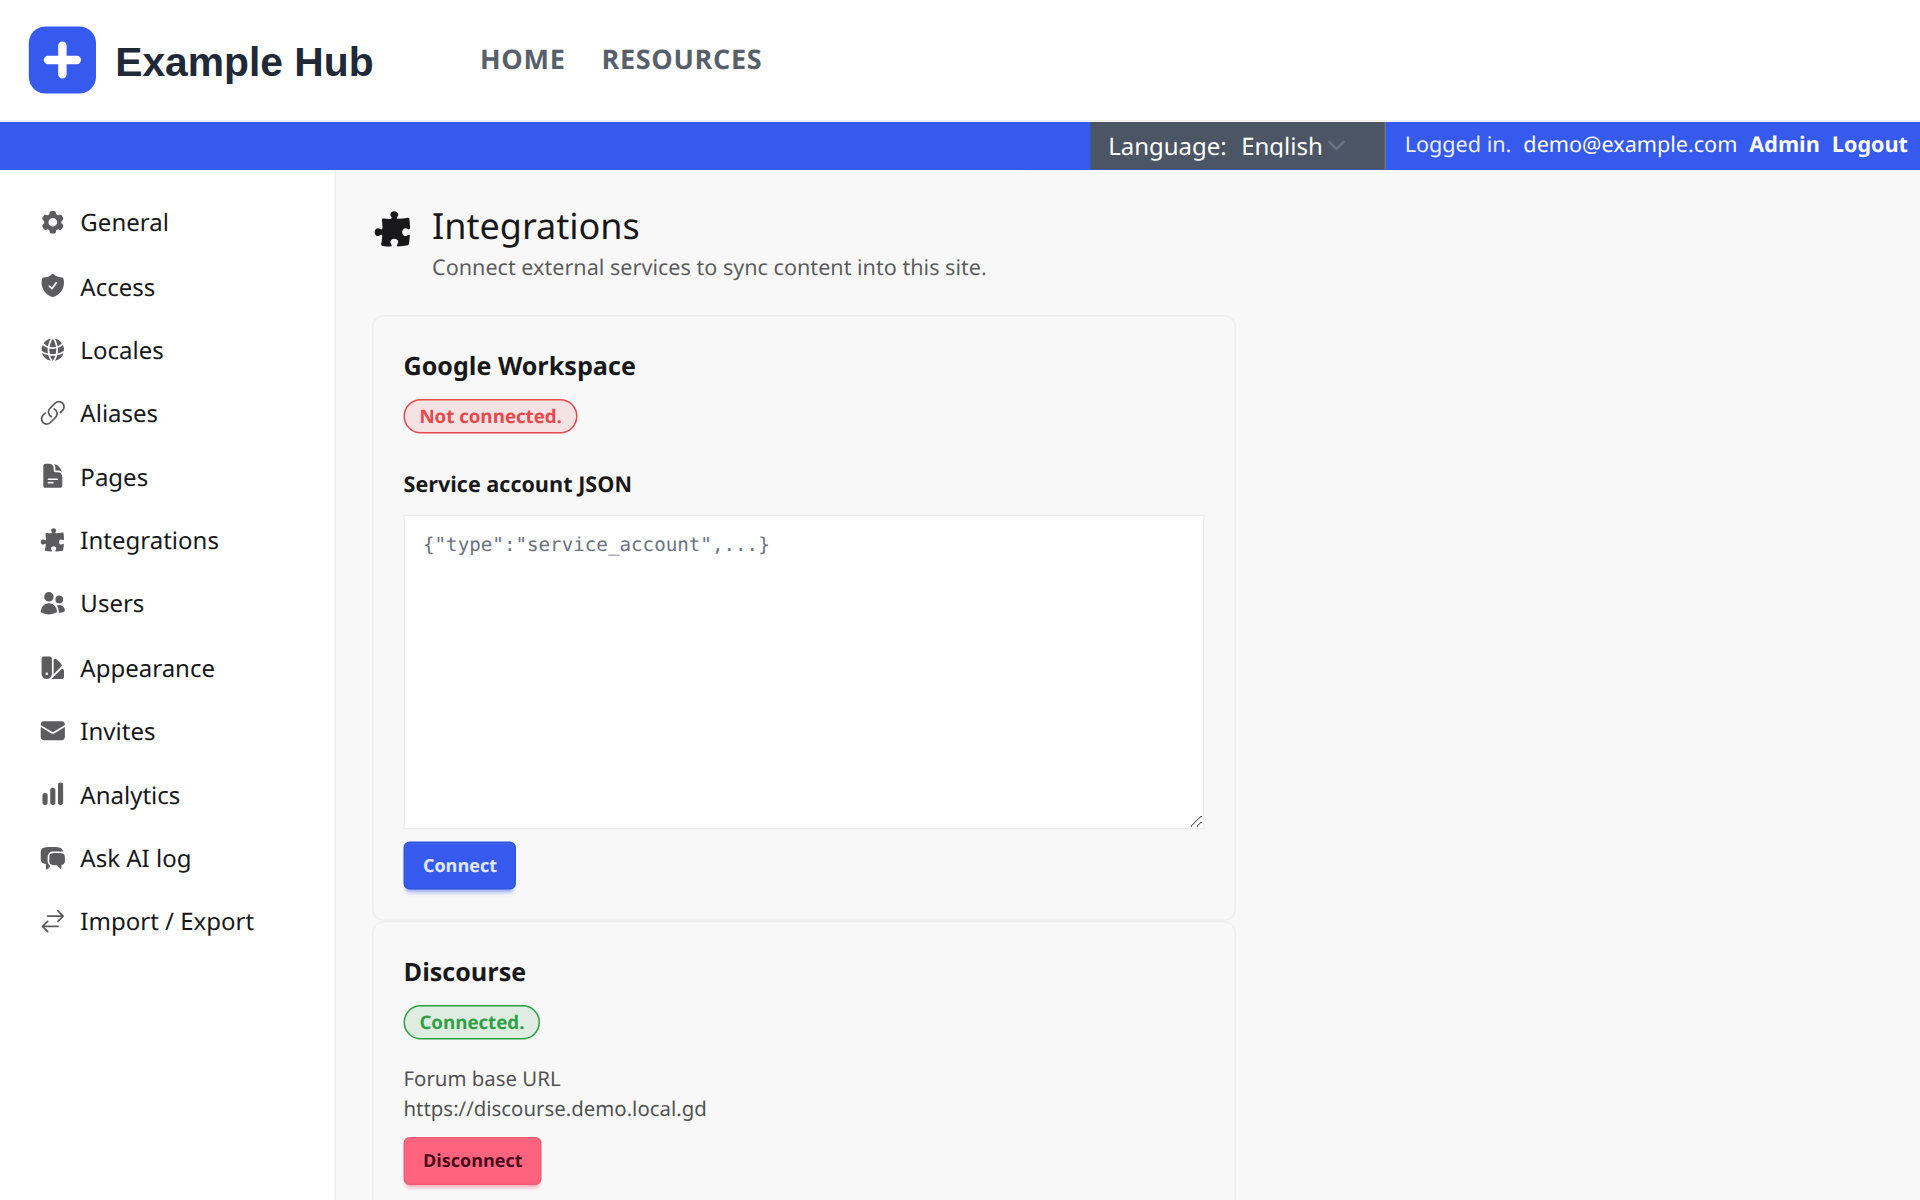
Integrations
Connects the services the site uses:
- Google Workspace: publishes documents from Google Docs (see above).
- Discourse: your forum, for single sign-on, forum search and the Community widgets.
- HeyForm: forms, for the Heyform widget.
- Umami analytics: visitor statistics.
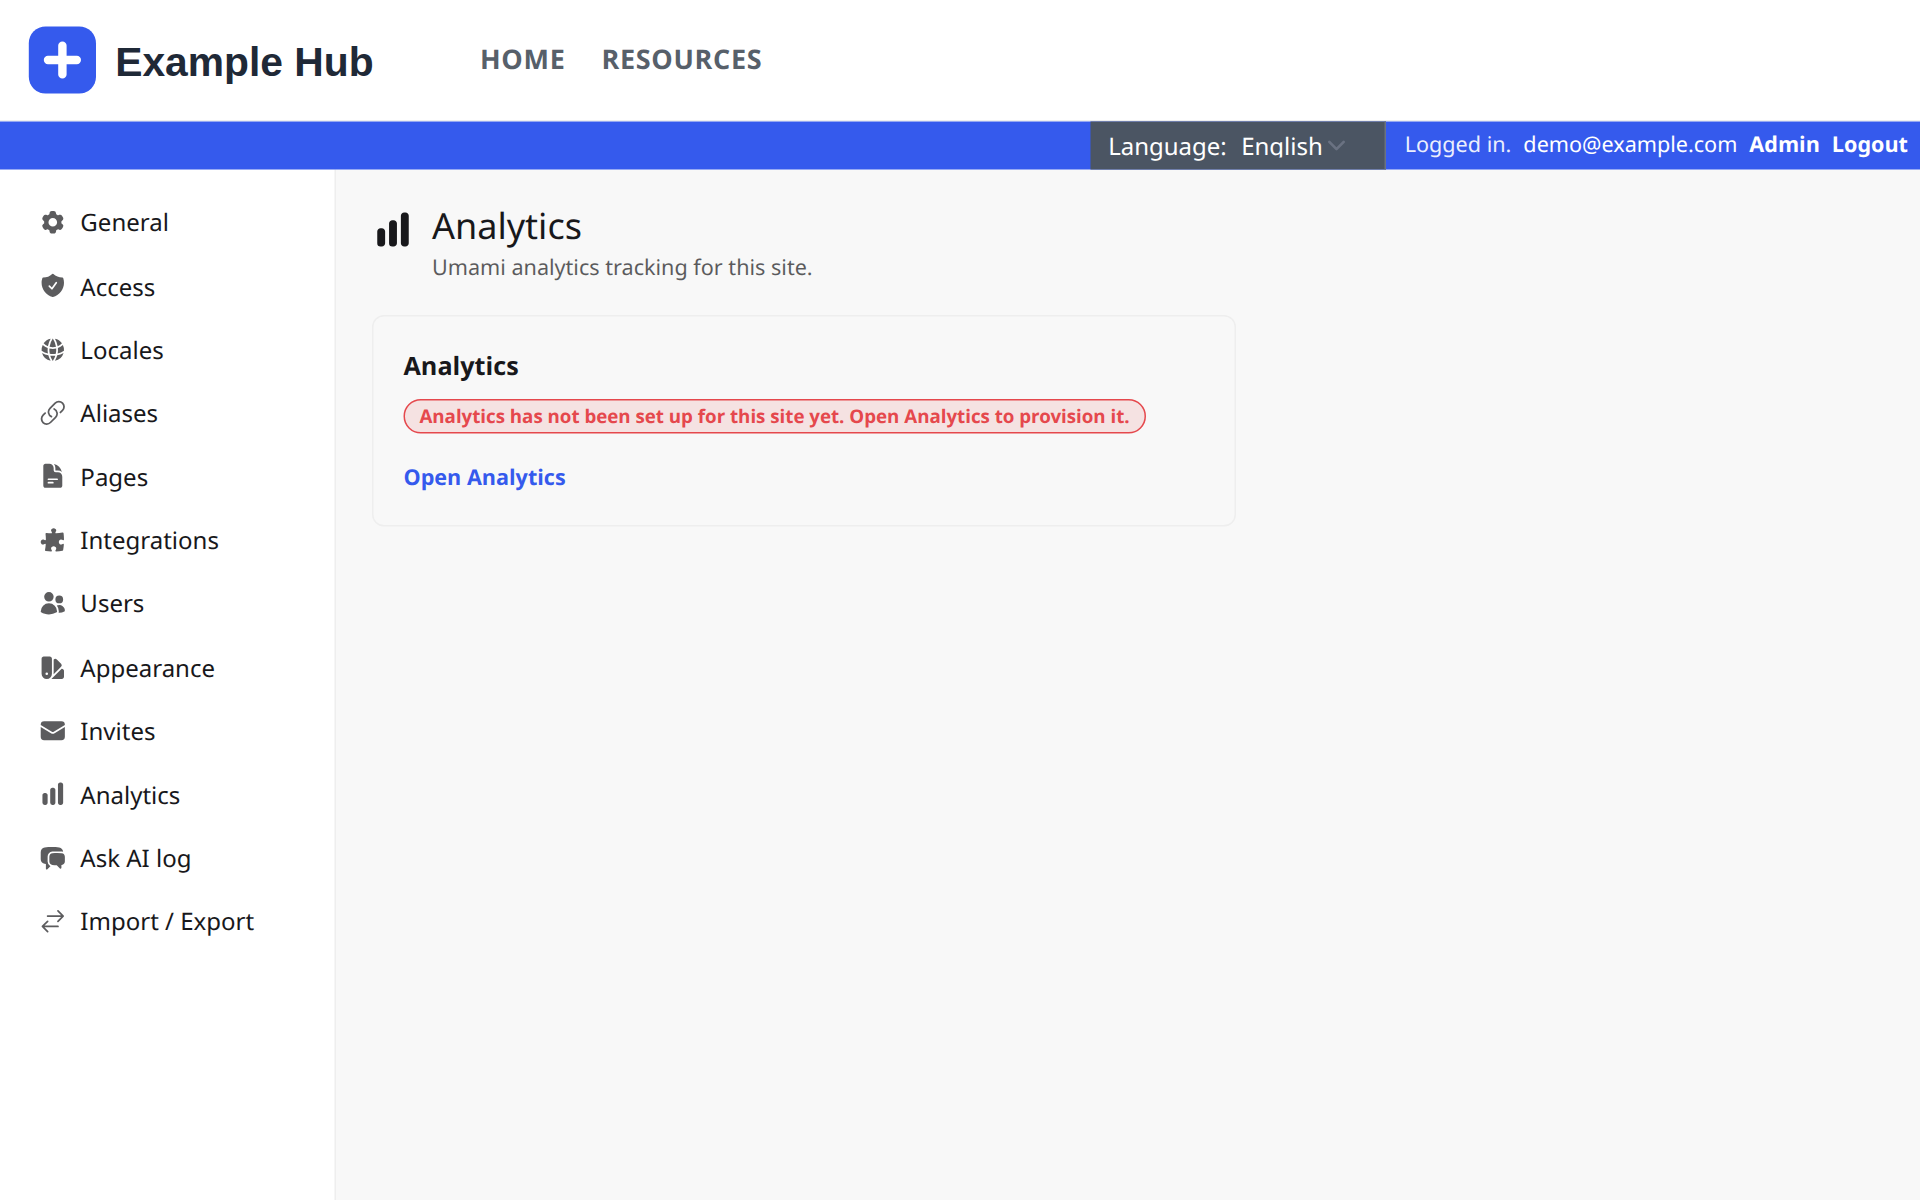
Analytics
Visitor numbers, page views, top pages and where visitors came from, over 24 hours, 7 days or 30 days. Open Analytics opens the full statistics. Tracking is switched on or off here, and uses no cookies.
Ask AI log
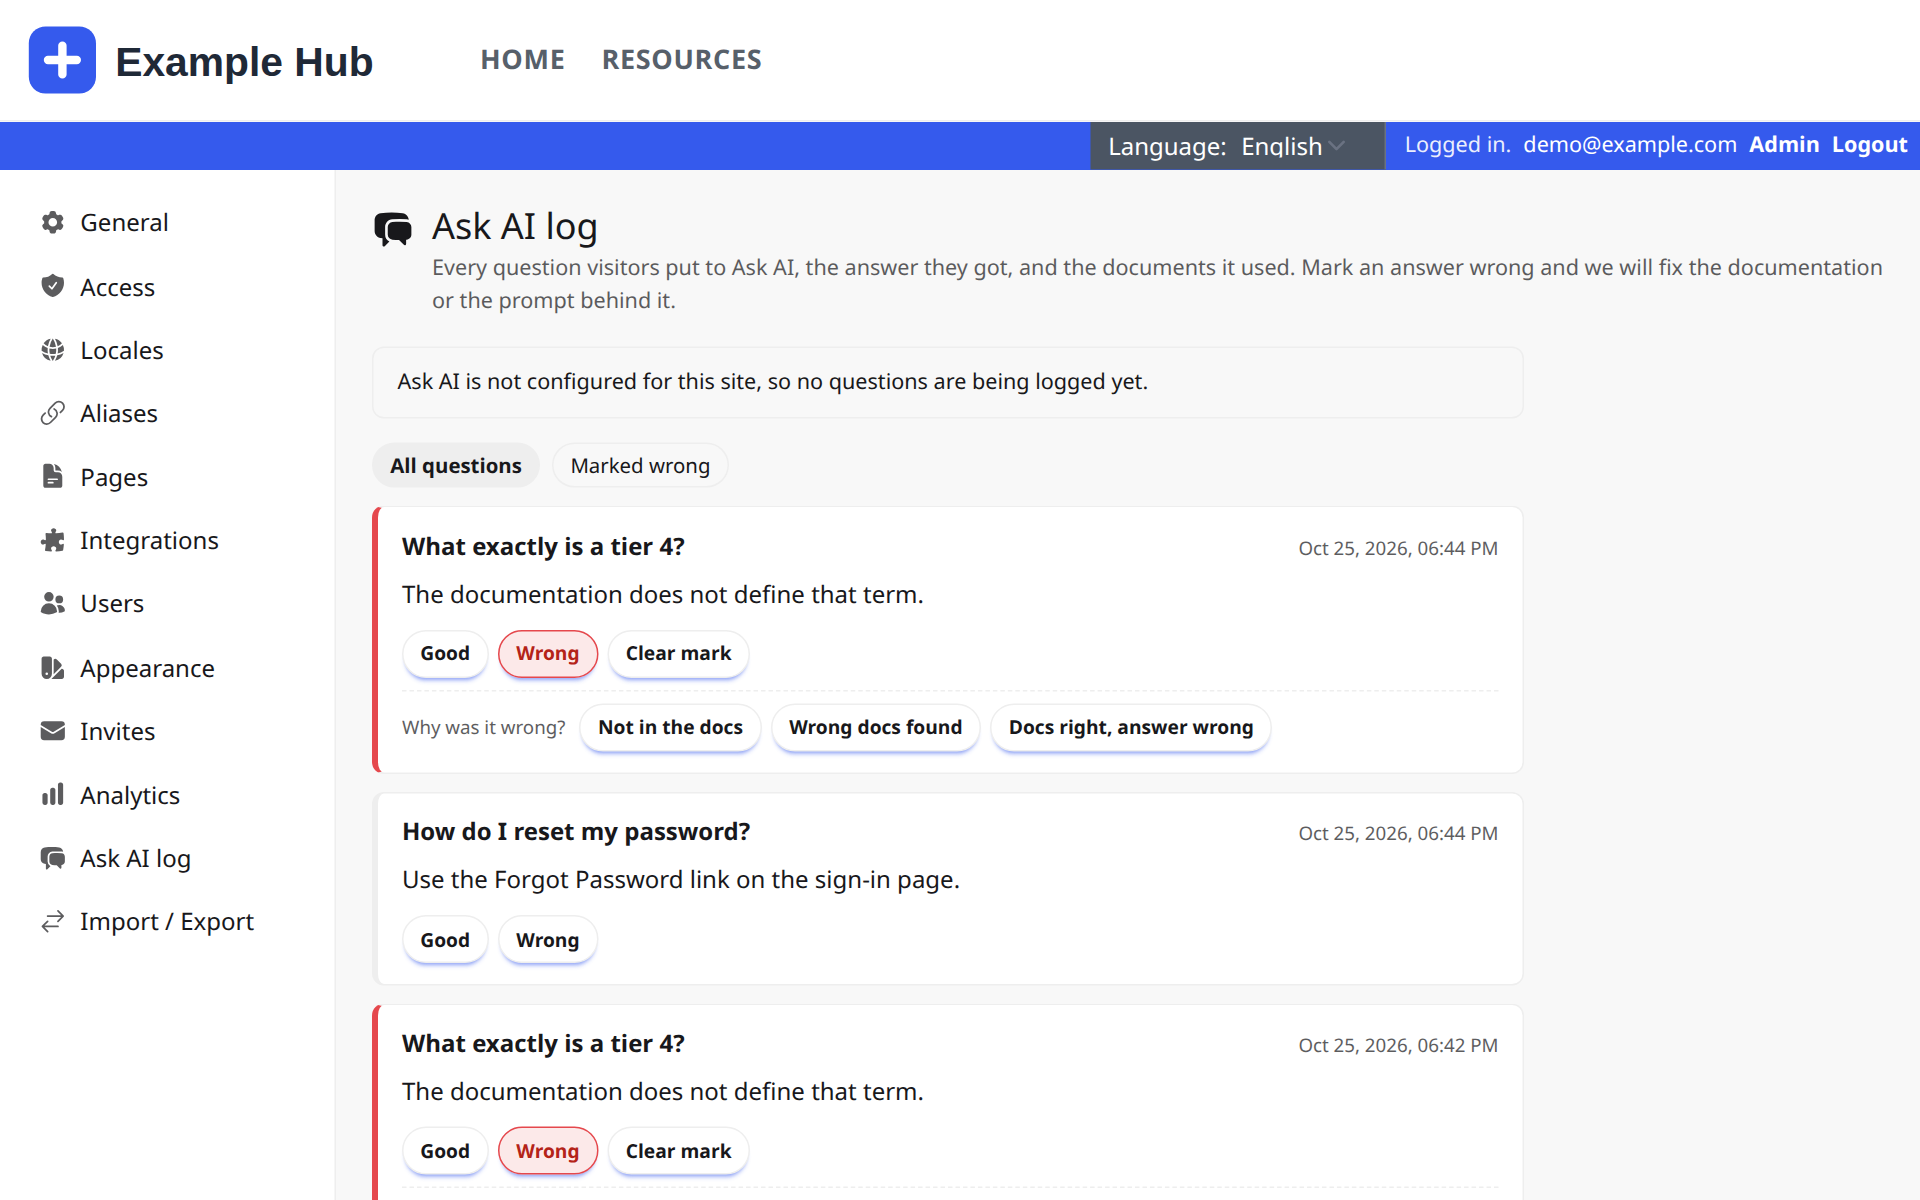
Every question visitors ask Ask AI, with the answer and the documents it used. Mark answers Good or Wrong. For a wrong one, say why: Not in the docs (write the missing content), Wrong docs found, or Docs right, answer wrong. "Marked wrong" lists everything that needs fixing.
Import / Export
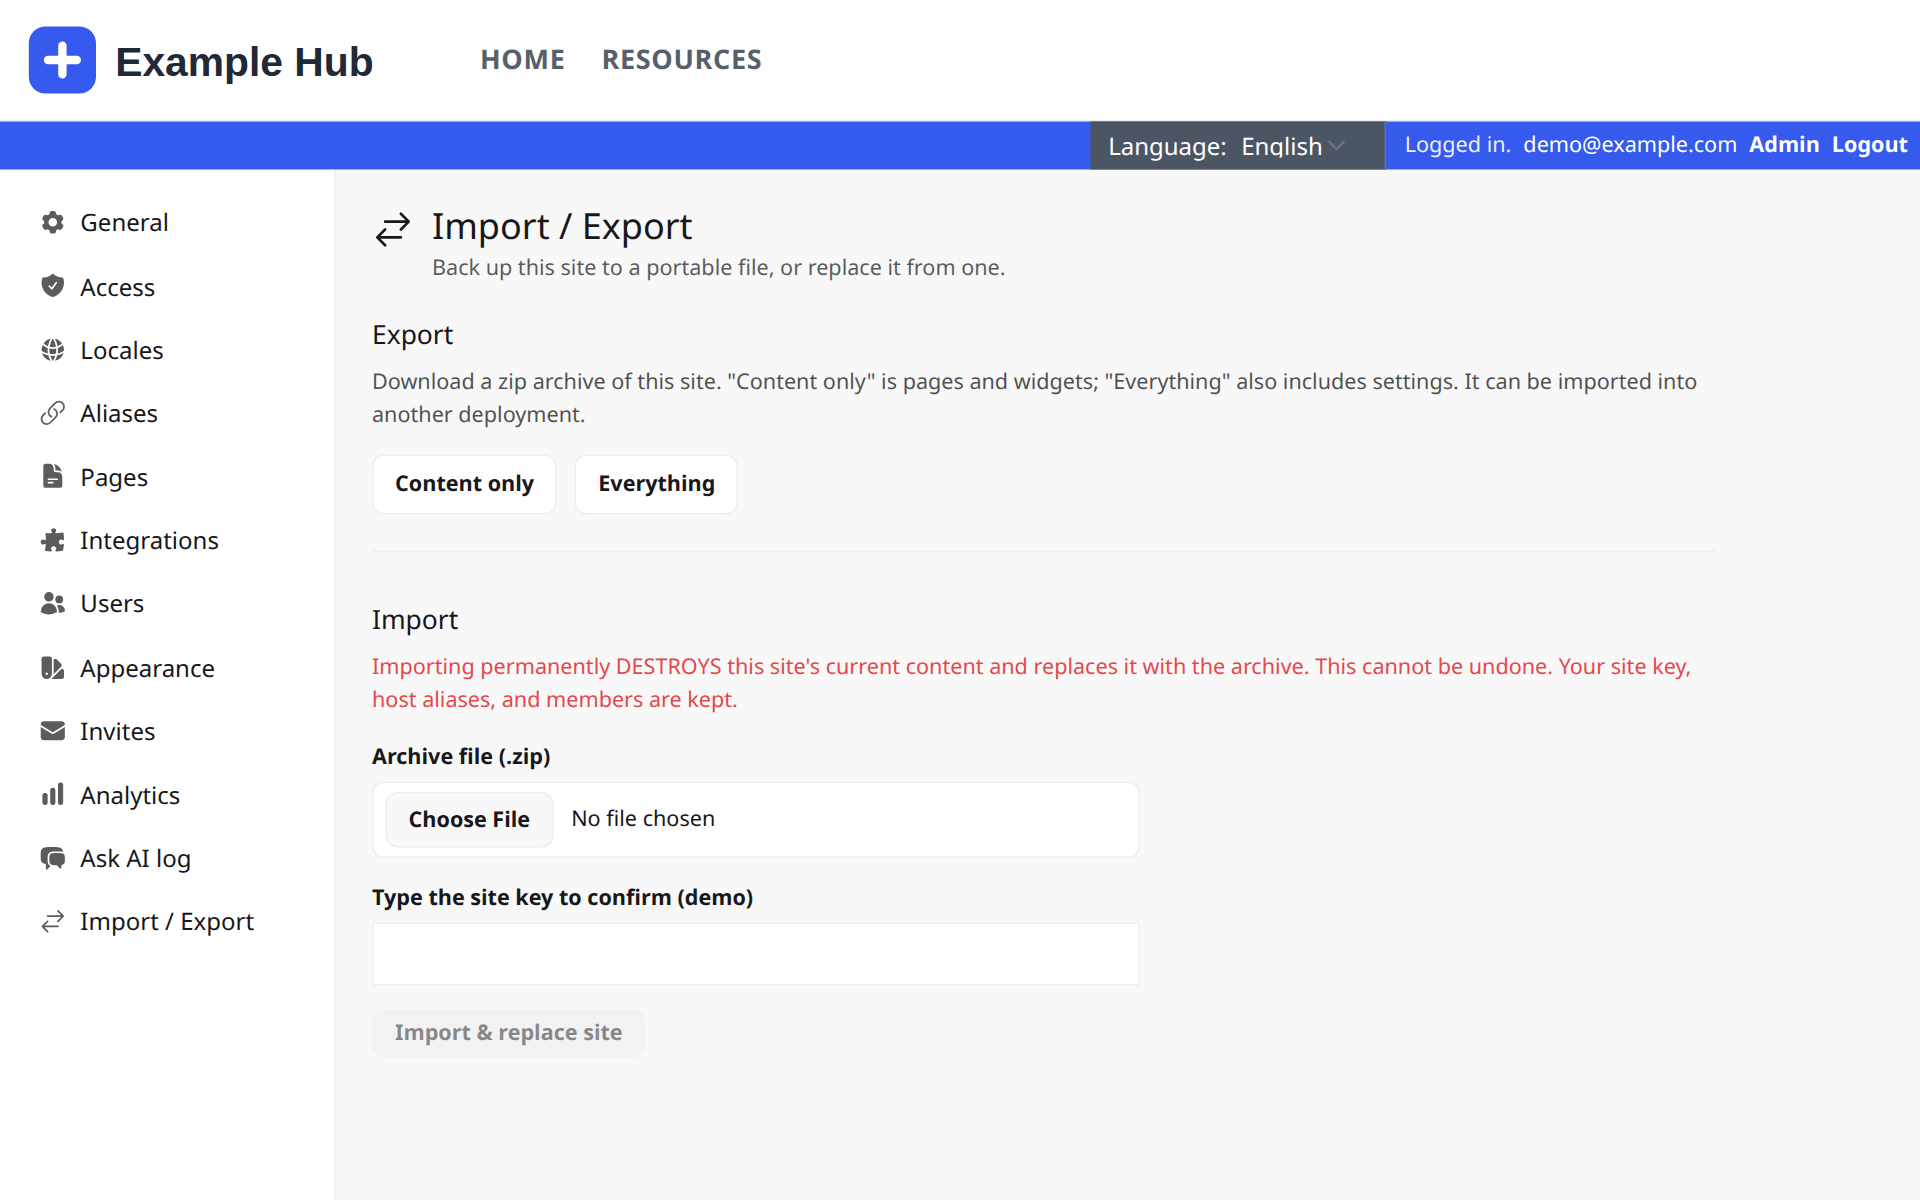
Export downloads the site as a zip file: "Content only" (pages and widgets) or "Everything" (settings too). Use it as a backup, or to copy a site. Import replaces the whole site with a zip file. It permanently deletes the current content, so export first.
Getting help
Problems, questions and ideas: contact the Support Hub team.